
Santa Chimney Advent Calendar Assembly Instructions
Here we have an instruction video and also step by step photo guide on putting our calendar together
VIDEO TO GO HERE
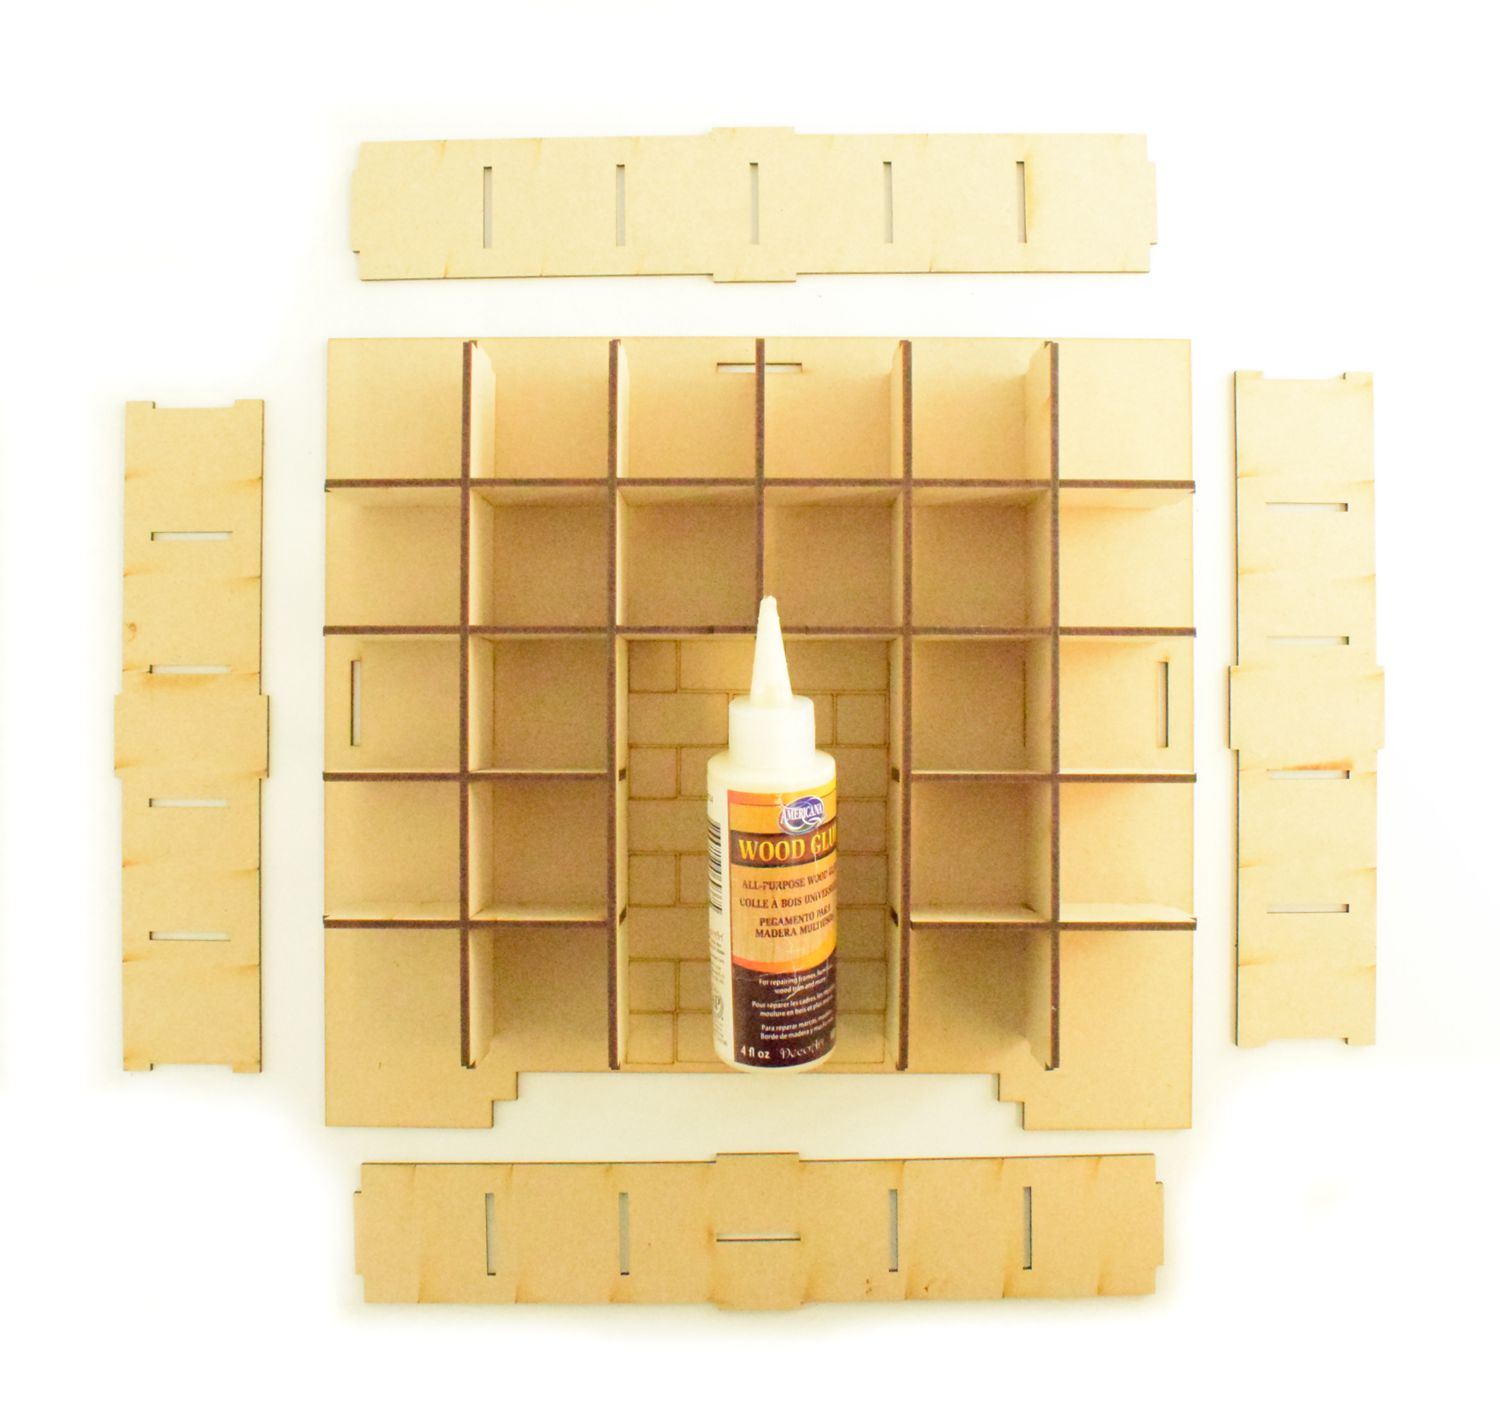
What you need
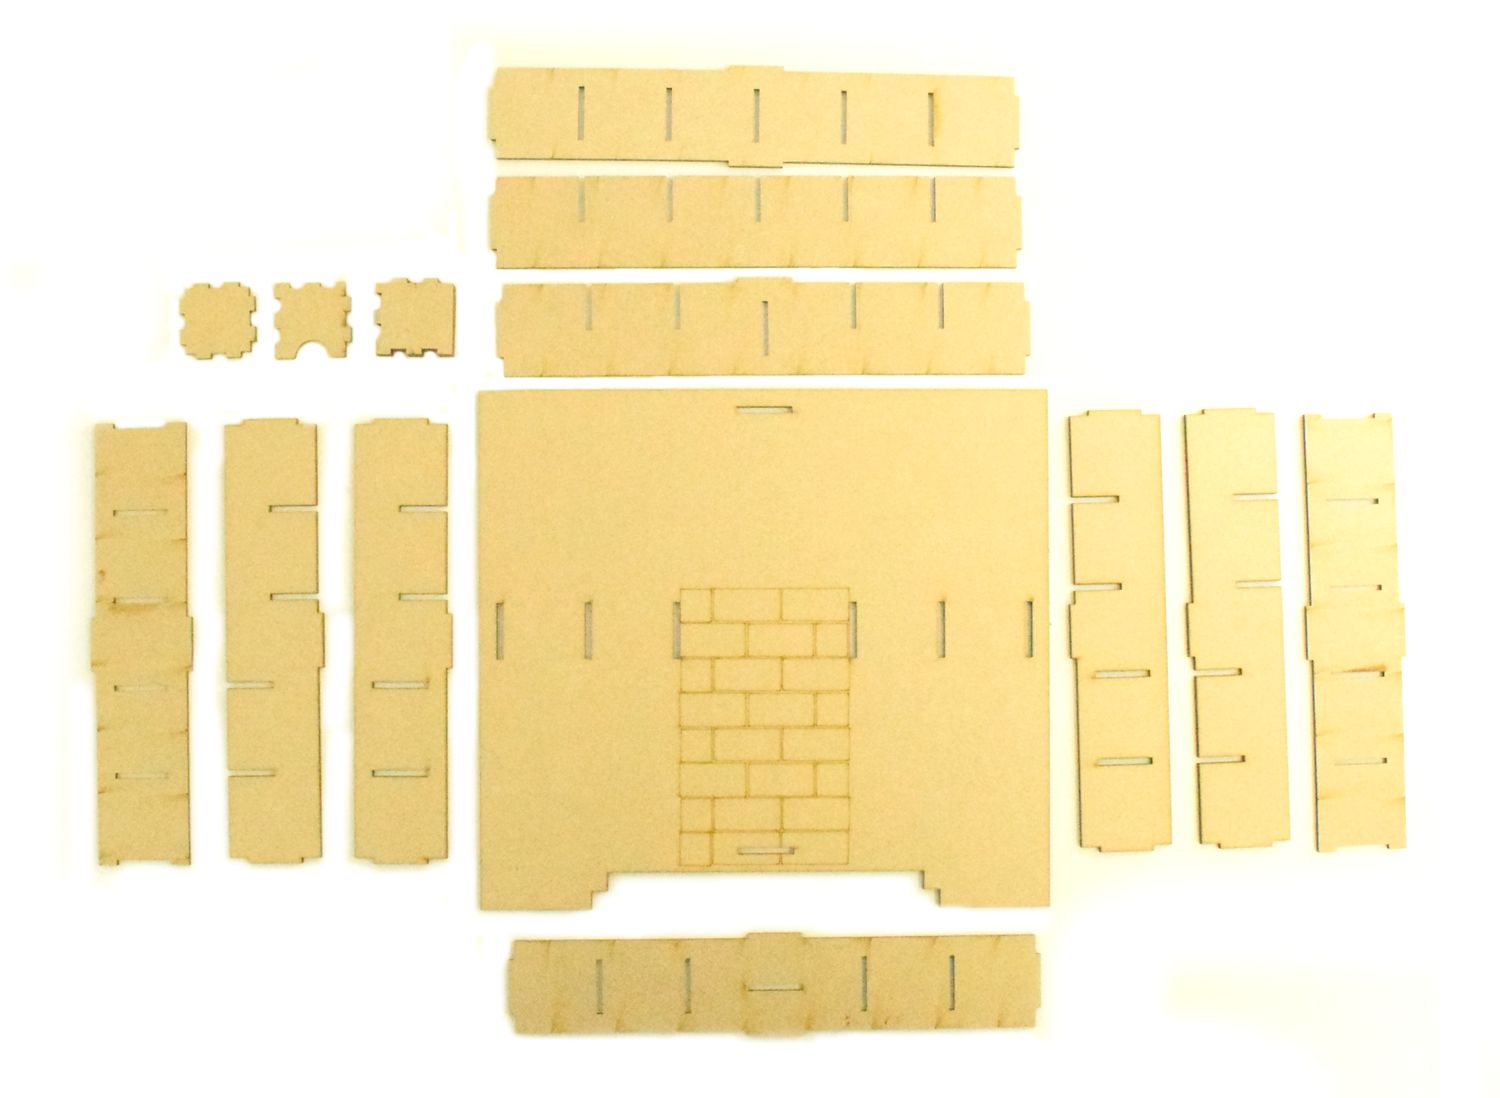
Step one
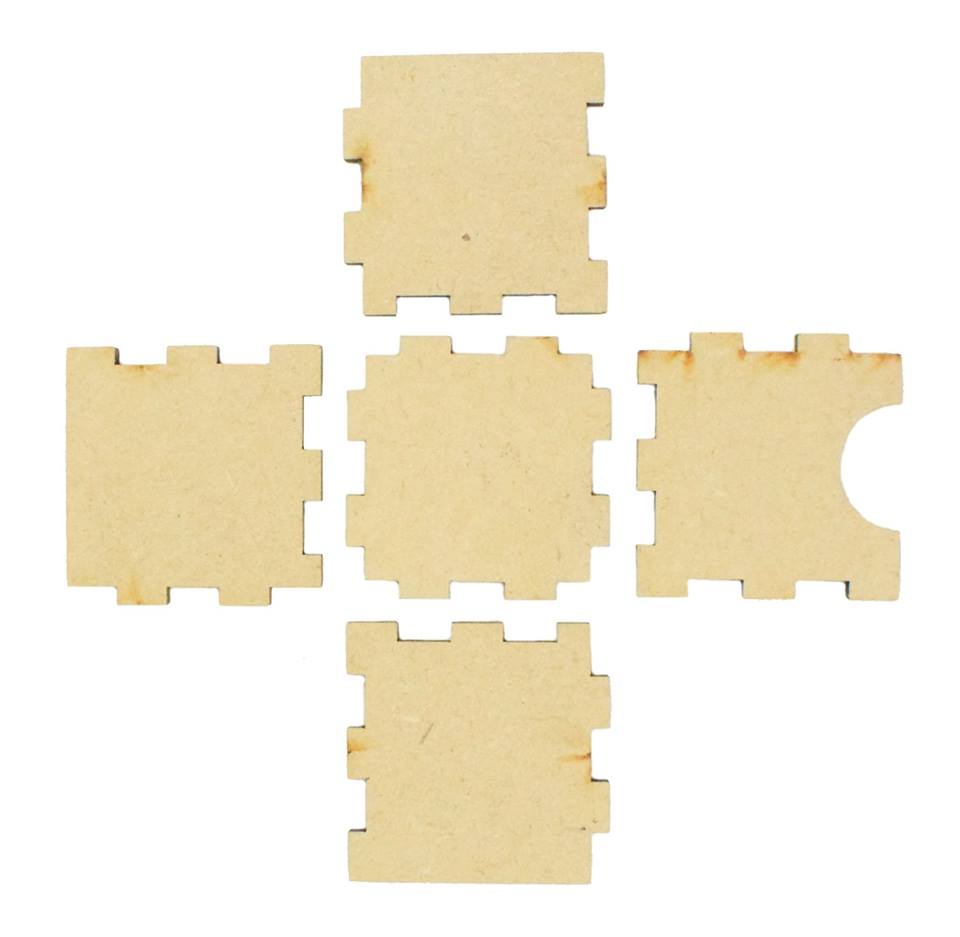
You will need the backing board and the following pieces
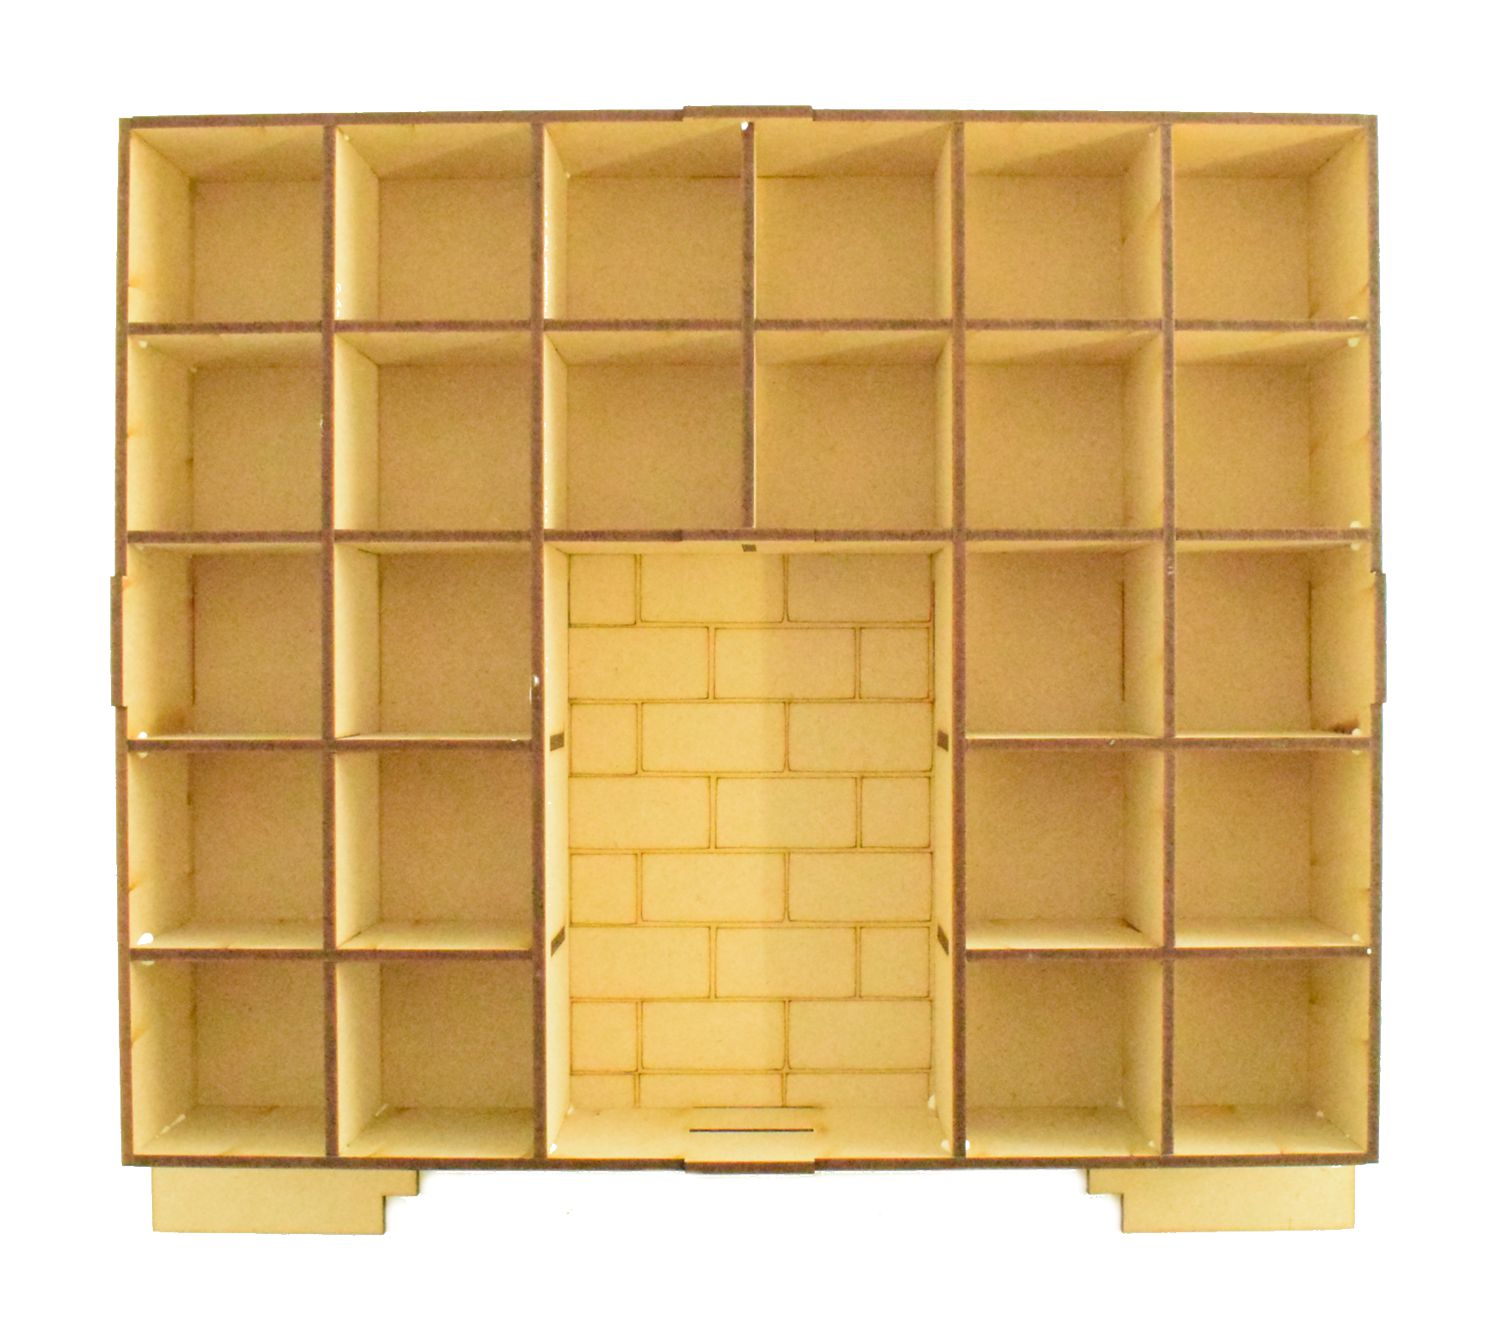
Step two
You will need to slot all the pieces together to make the below pattern
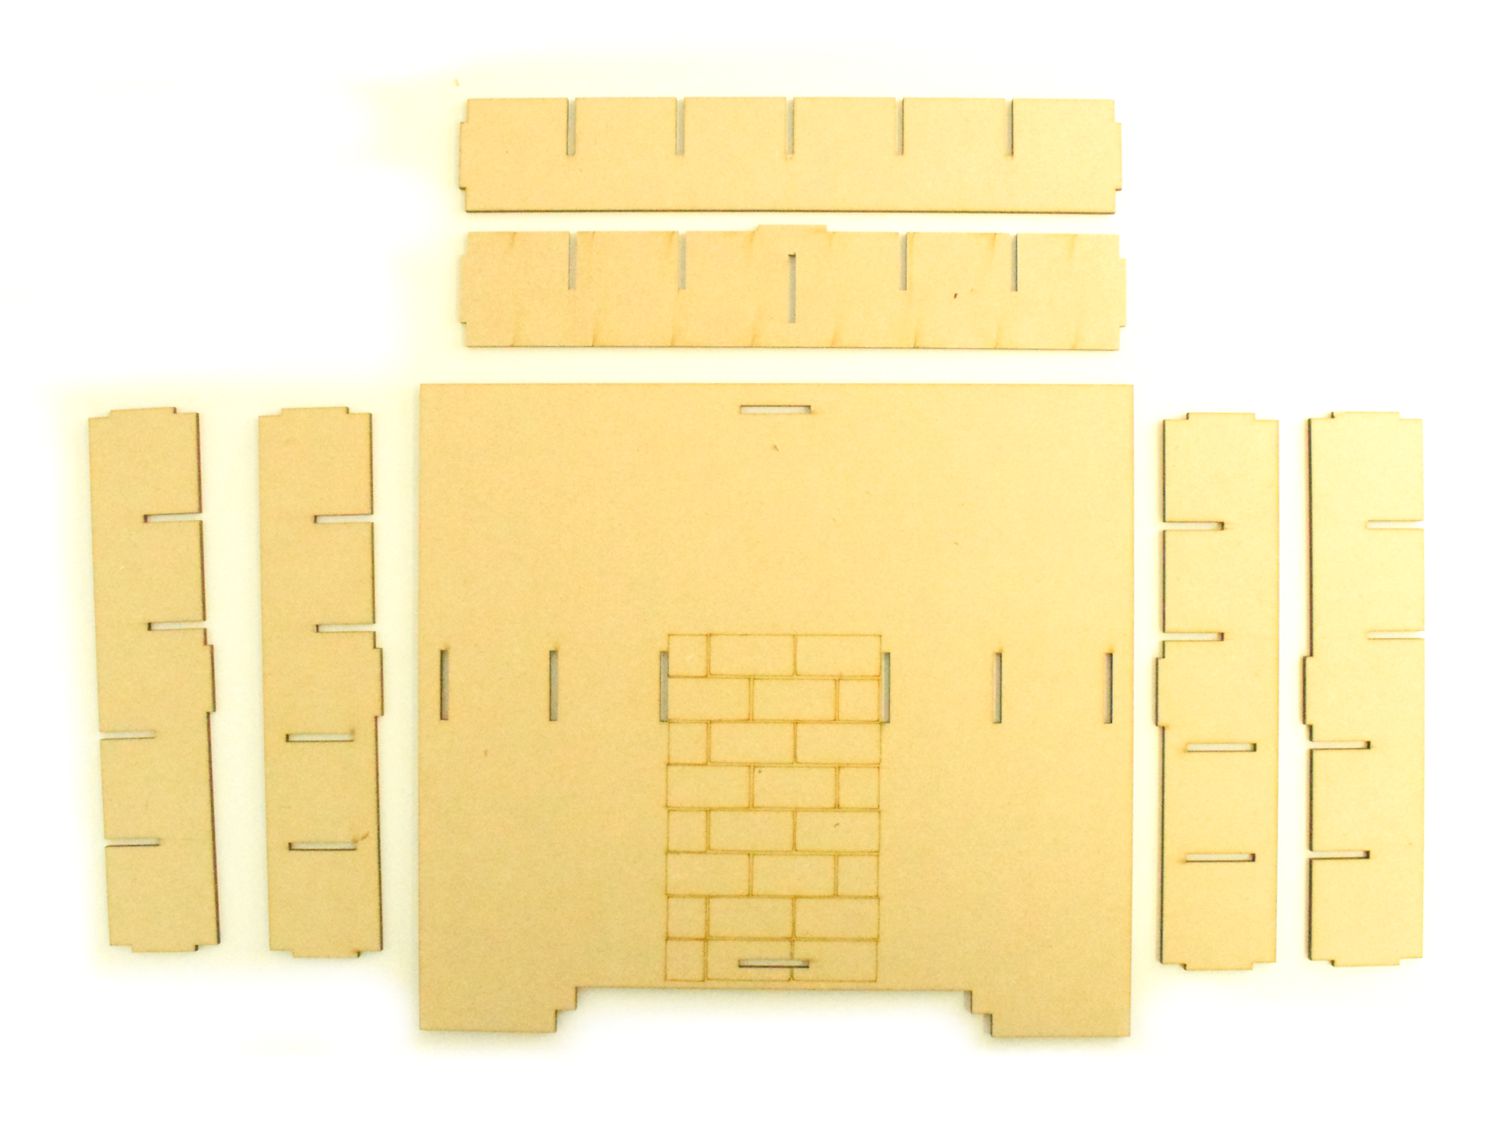
Step three
Next you will need wood glue and the 4 outer pieces
Step four
Apply wood glue to all the areas that will be joined. Once done fit and slot these into each side, top and bottom
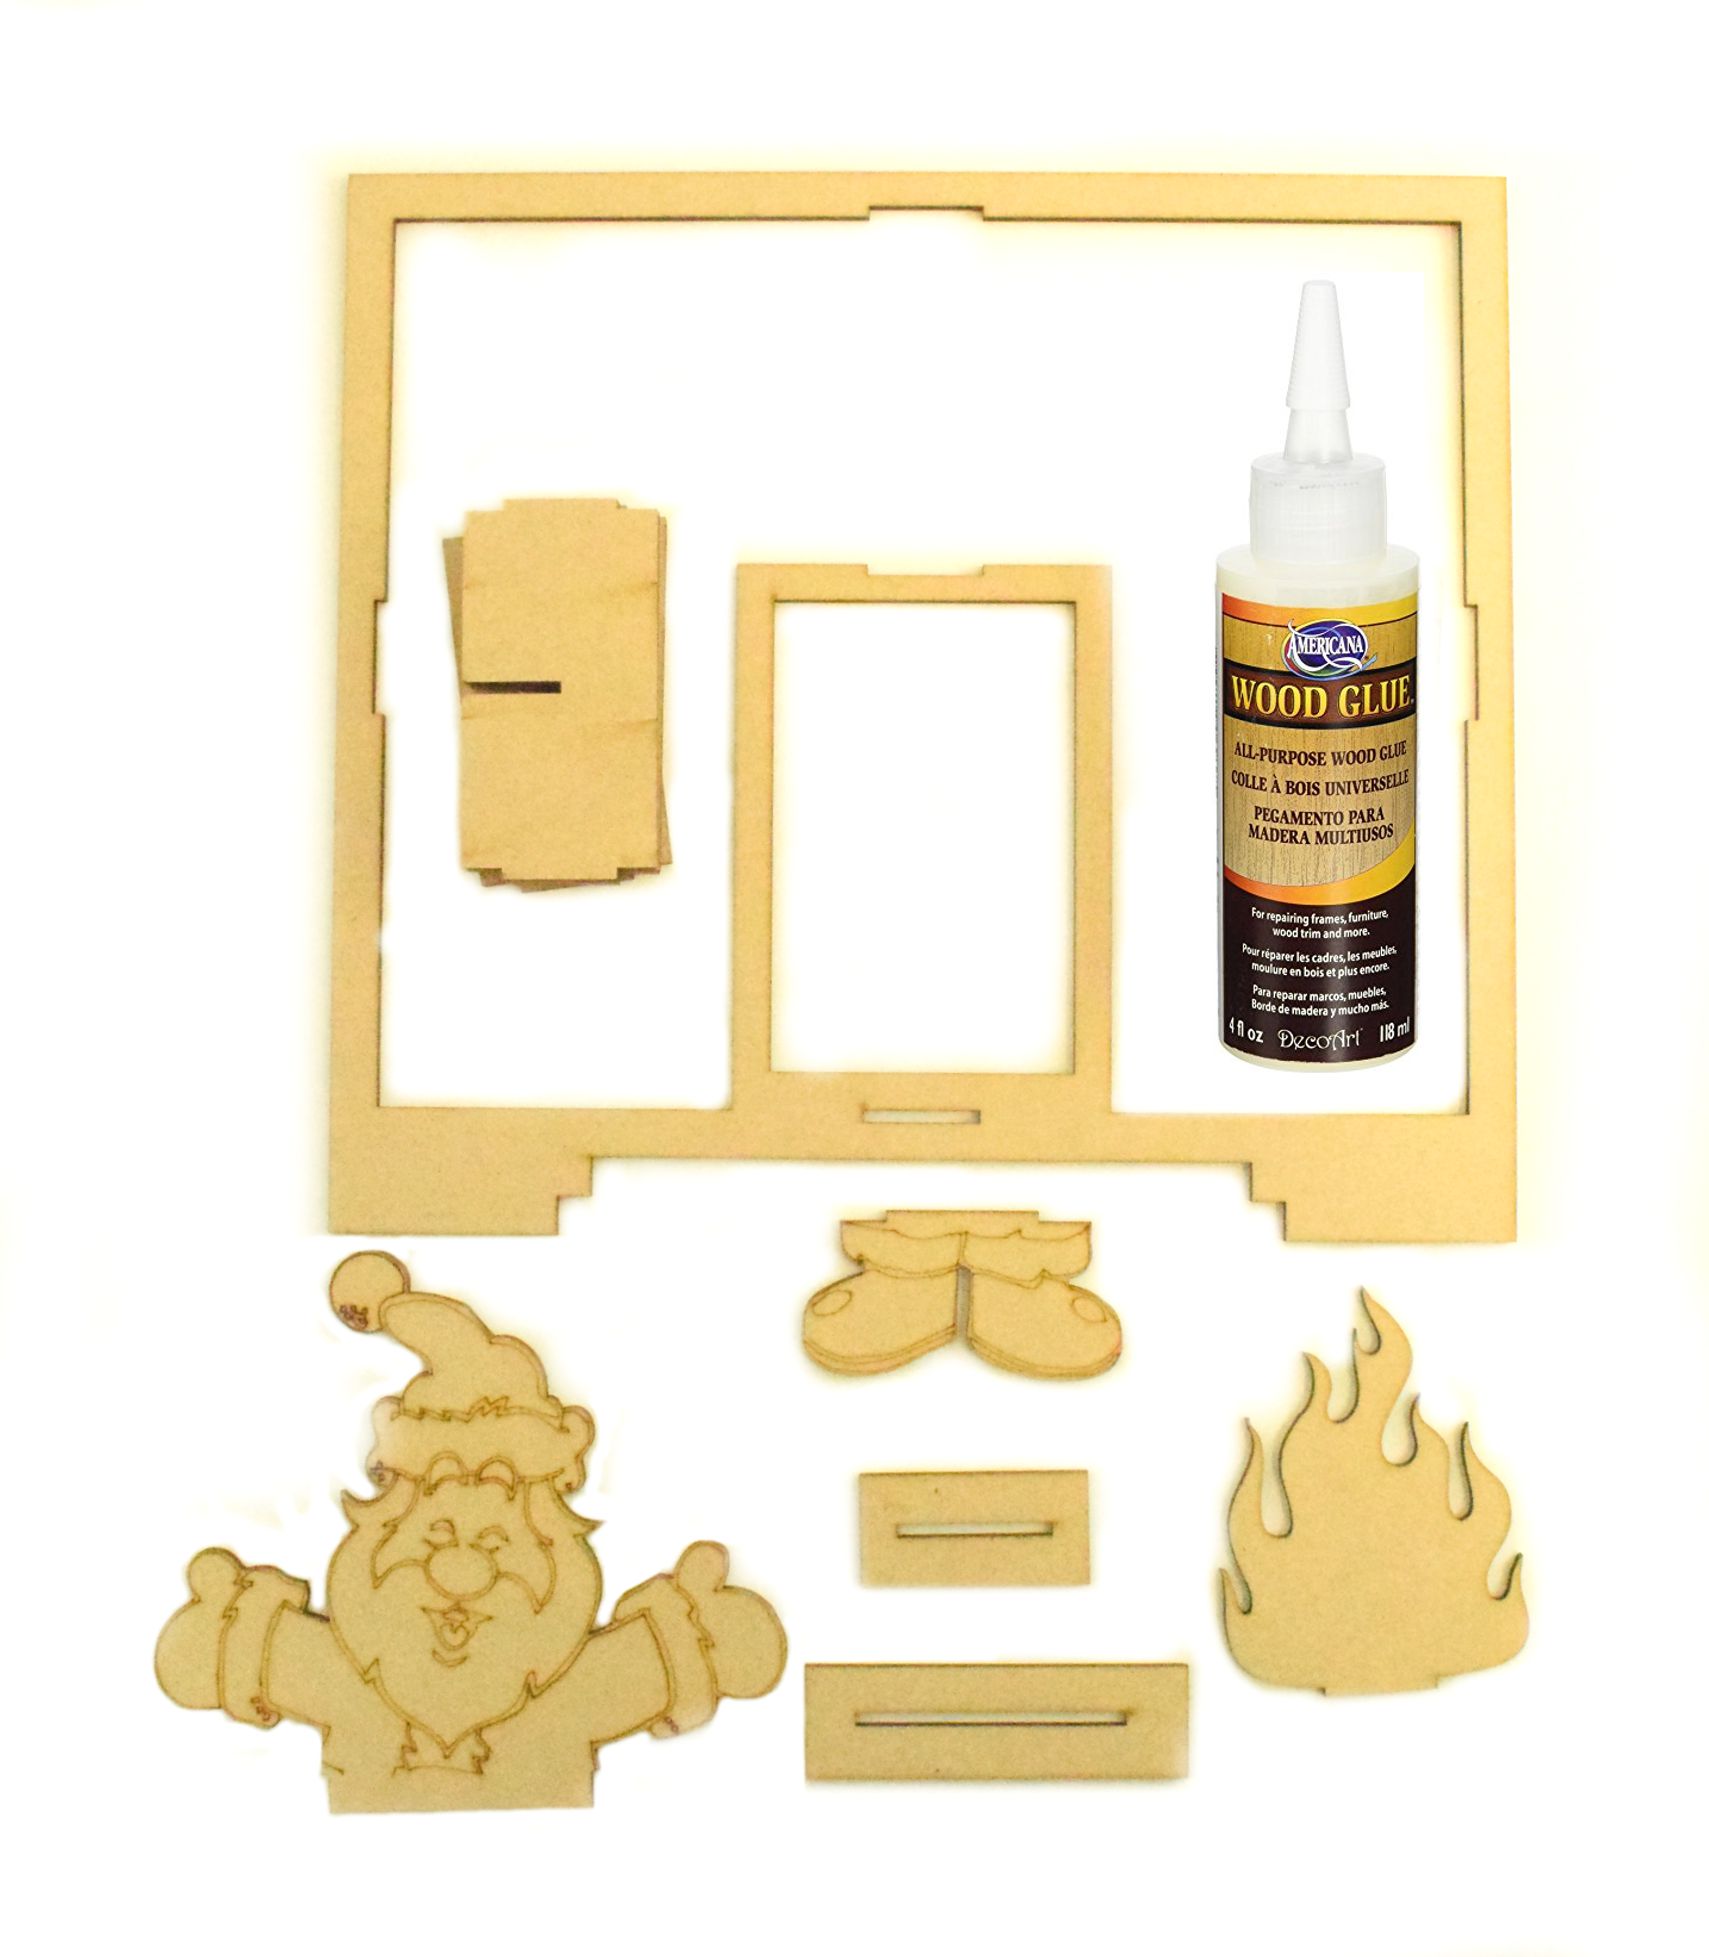
Step five
You will now need the front frame section and also the santa, feet and bars
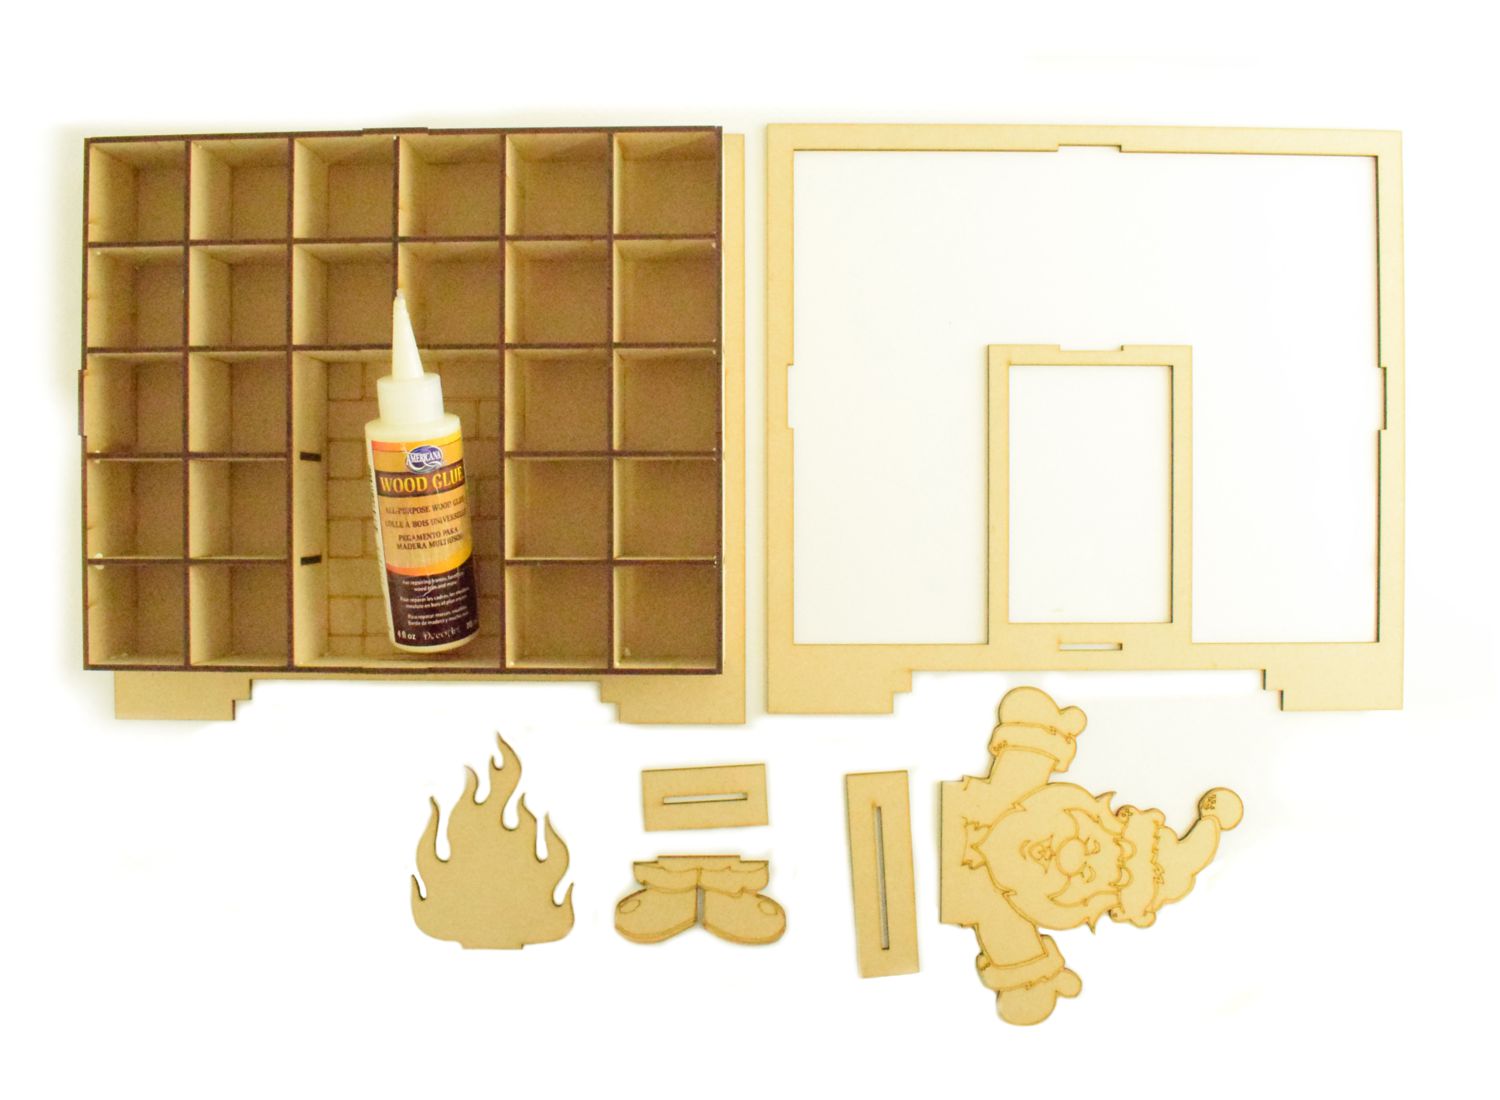
Glue the feet onto the small bar, the santa onto the large bar and glue all the accessory pieces onto the calendar
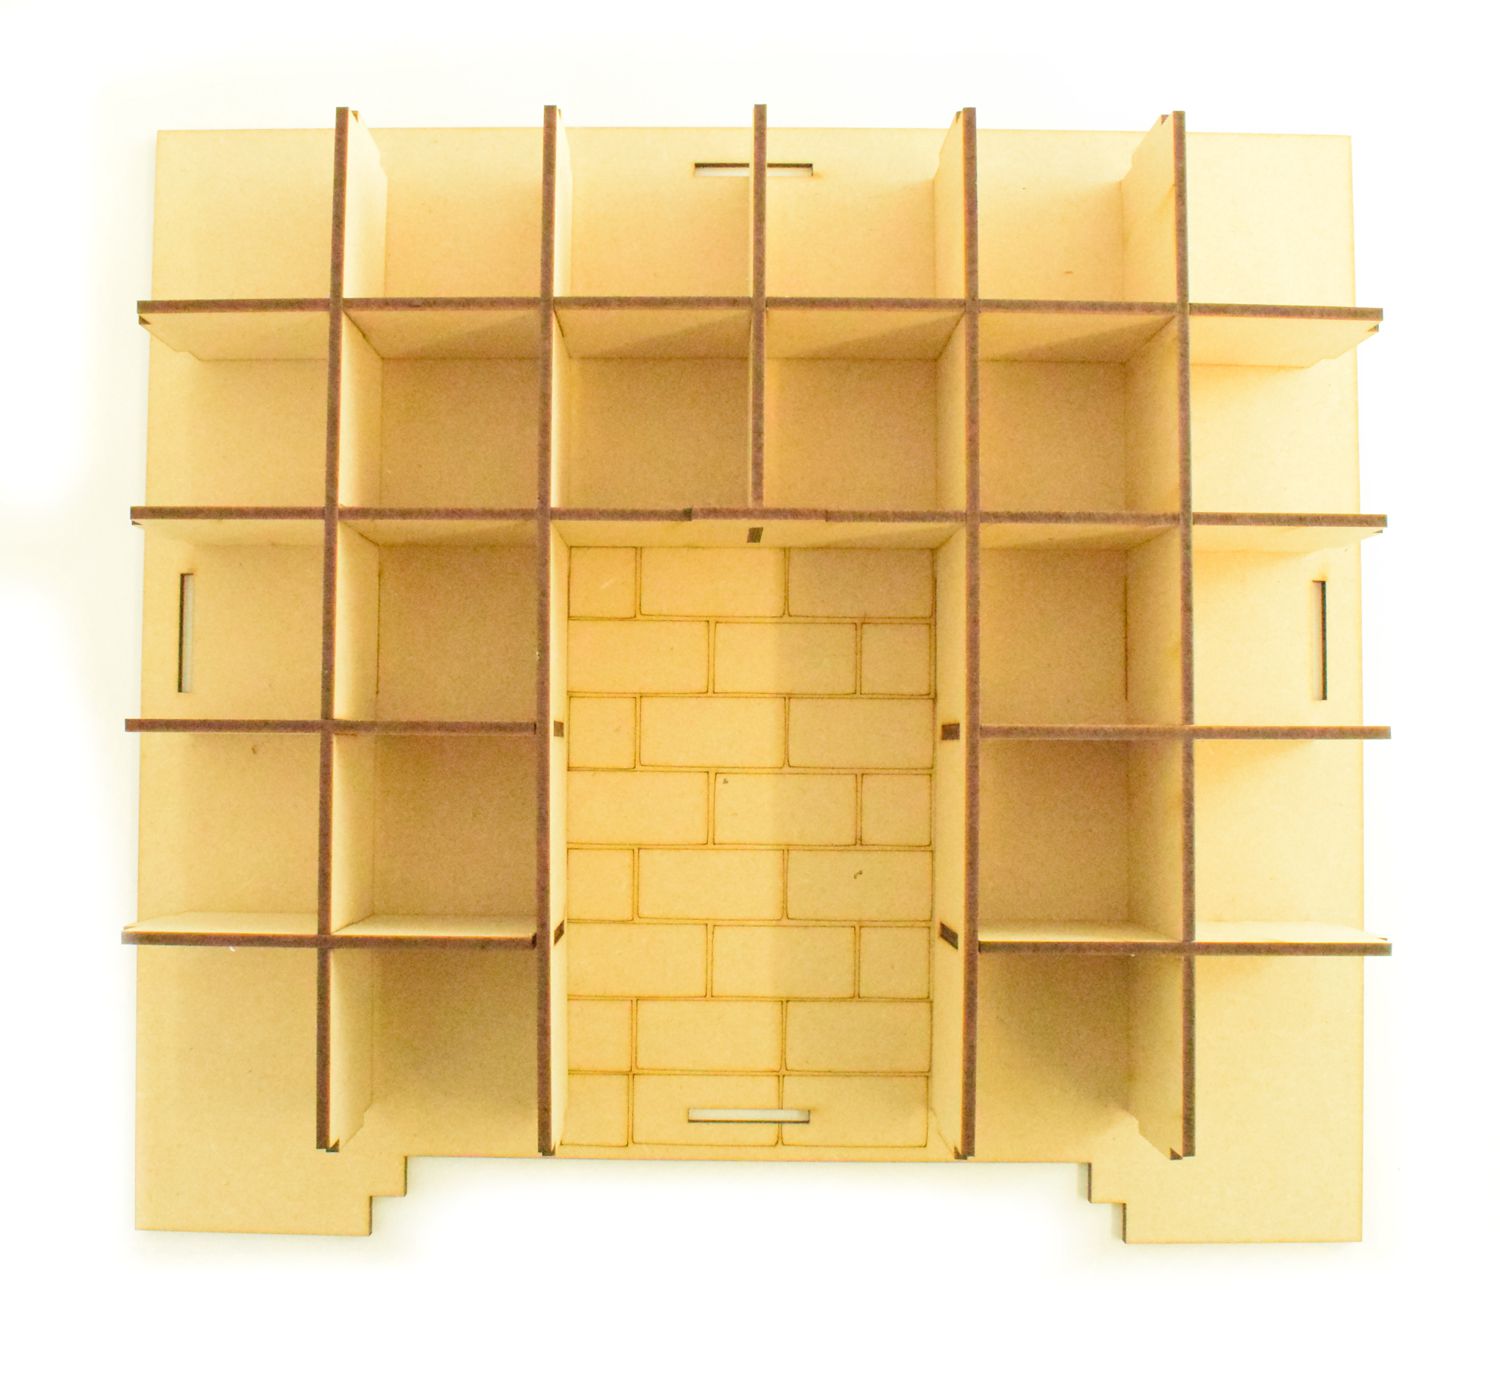
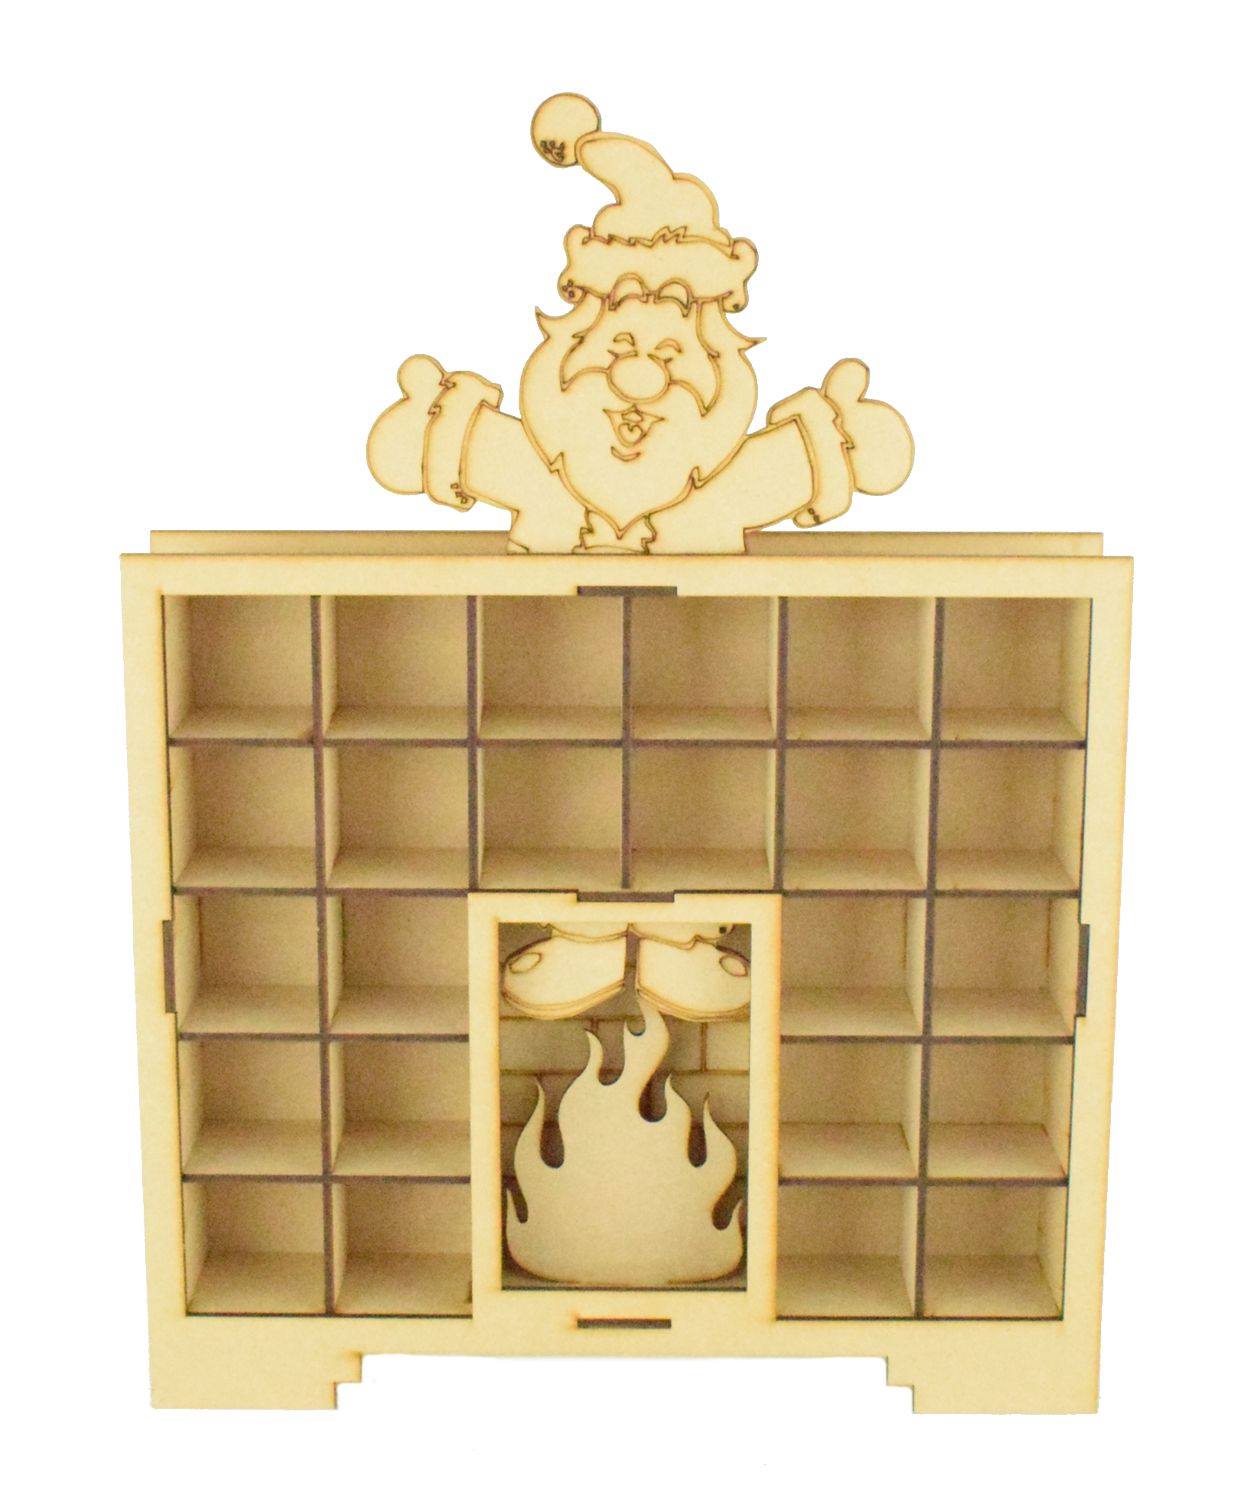
Completed main section
Next onto the drawers
You will need the following pieces for each drawer
In each corner join you will have a small rectangle and a large square.
Apply wood glue to all the lower teethed areas on all the sides of each piece
Once done bring all the pieces together to form a box
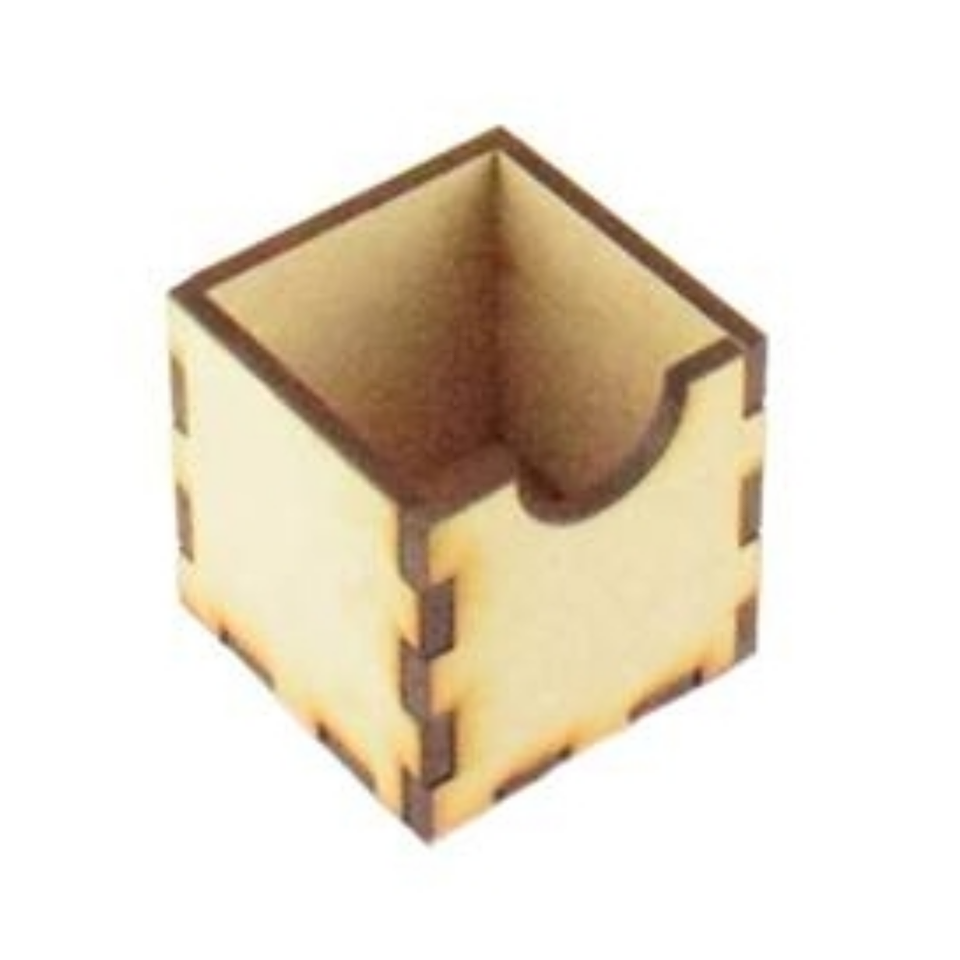
Repeat with all the other drawers
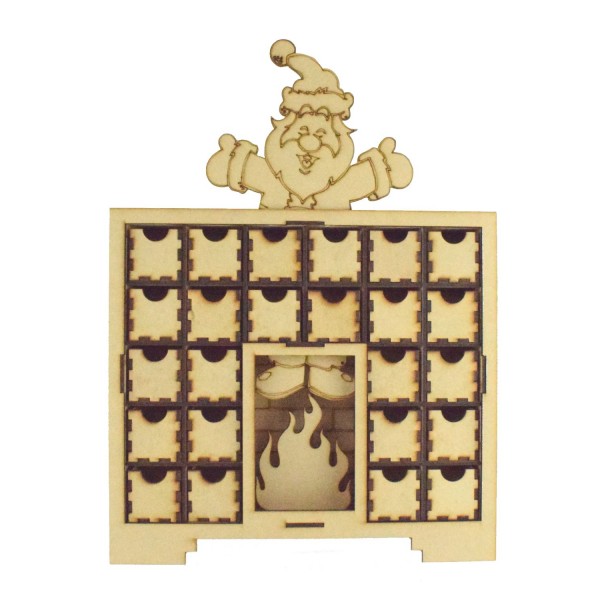
We also have calendar numbers for the front of the drawers

We hope you found this instruction blog helpful
Please leave us a comment below