
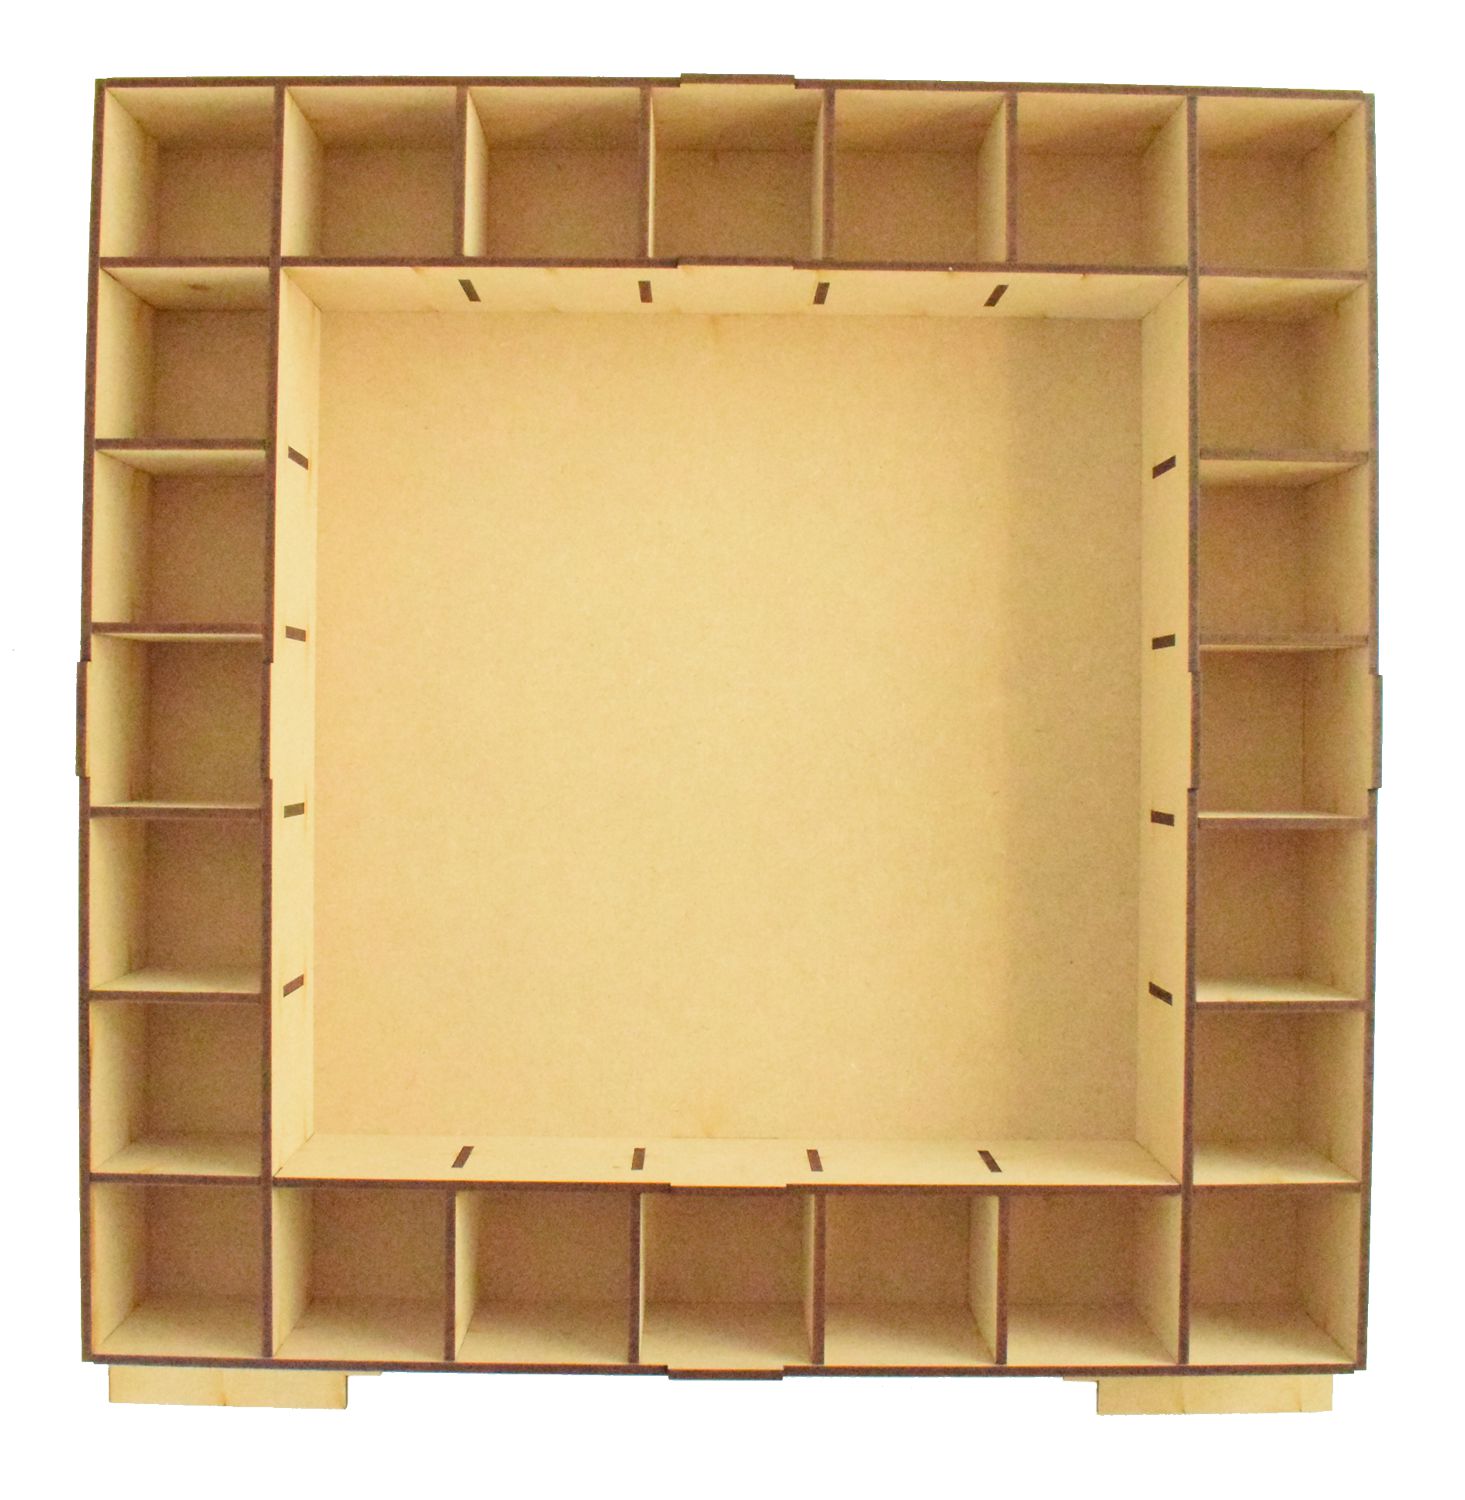
Advent calendar with centre scene
We have an instruction video and step by step photo instructions on how to put our square scene advent calendar together
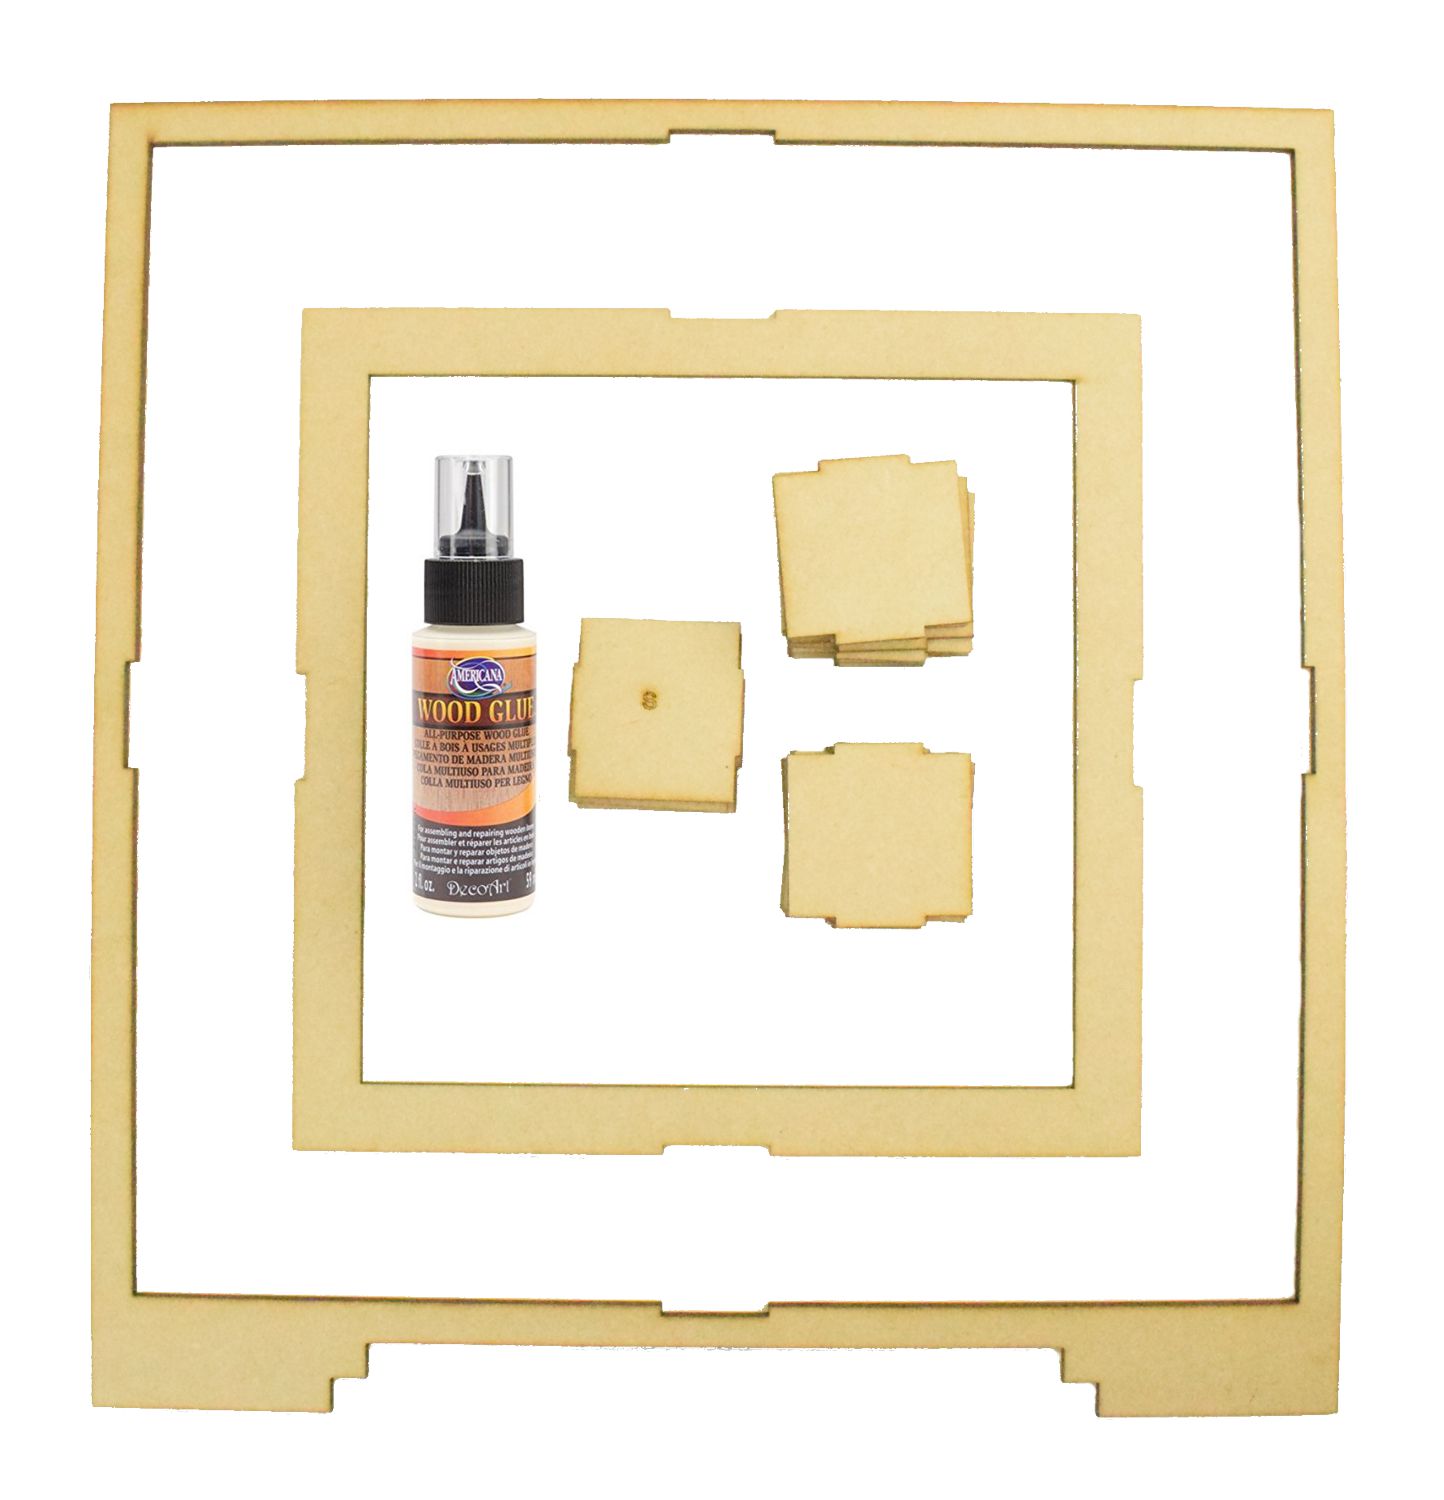
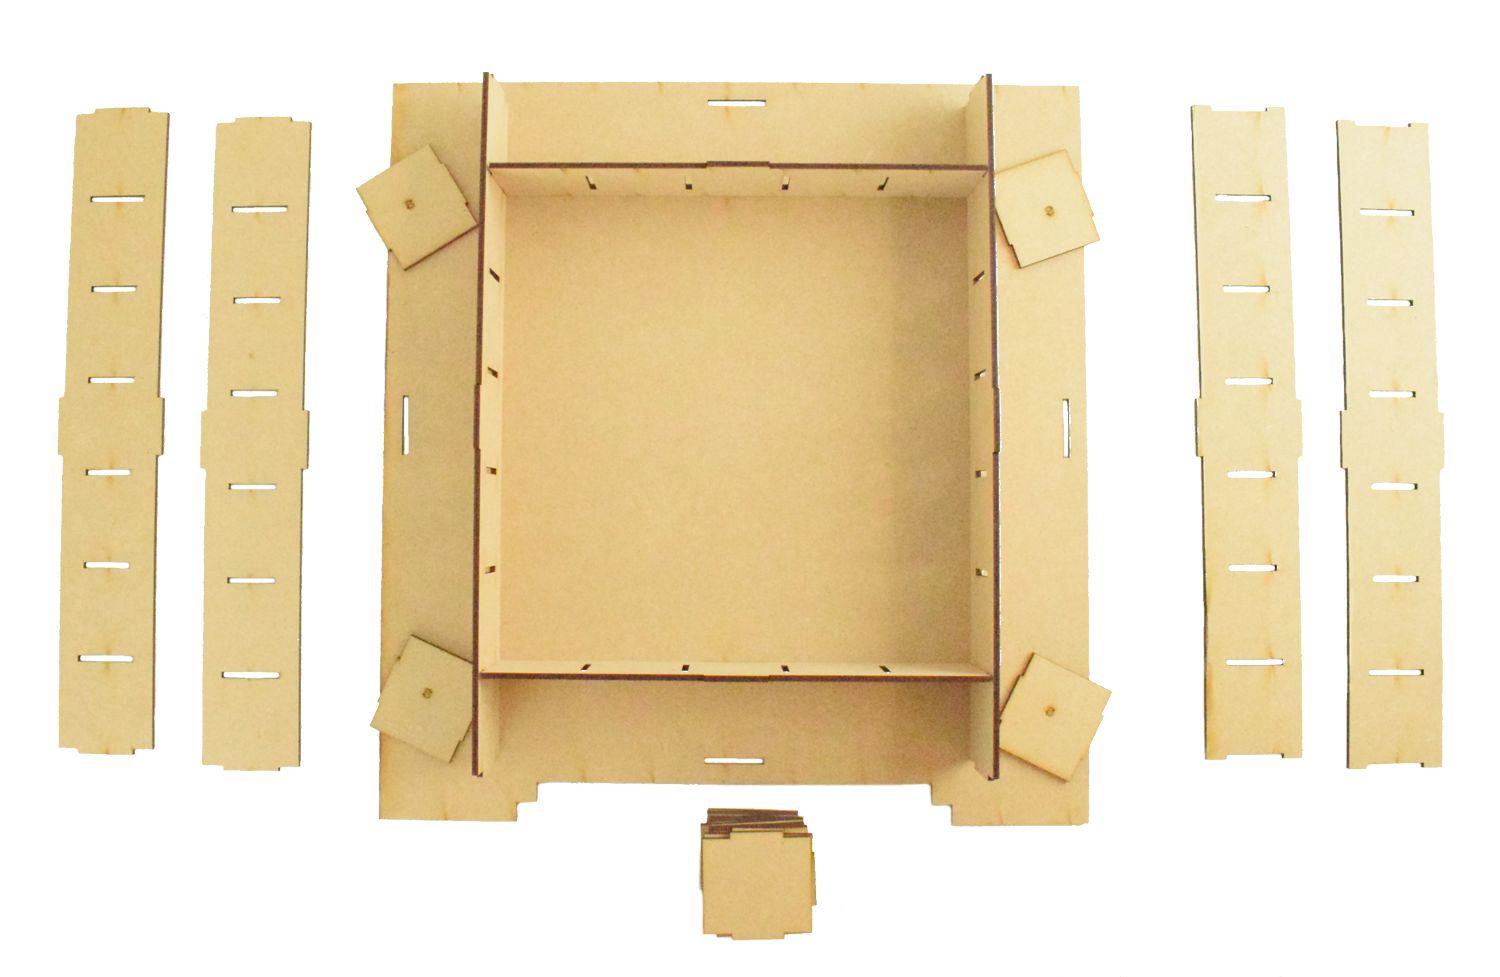
What you need
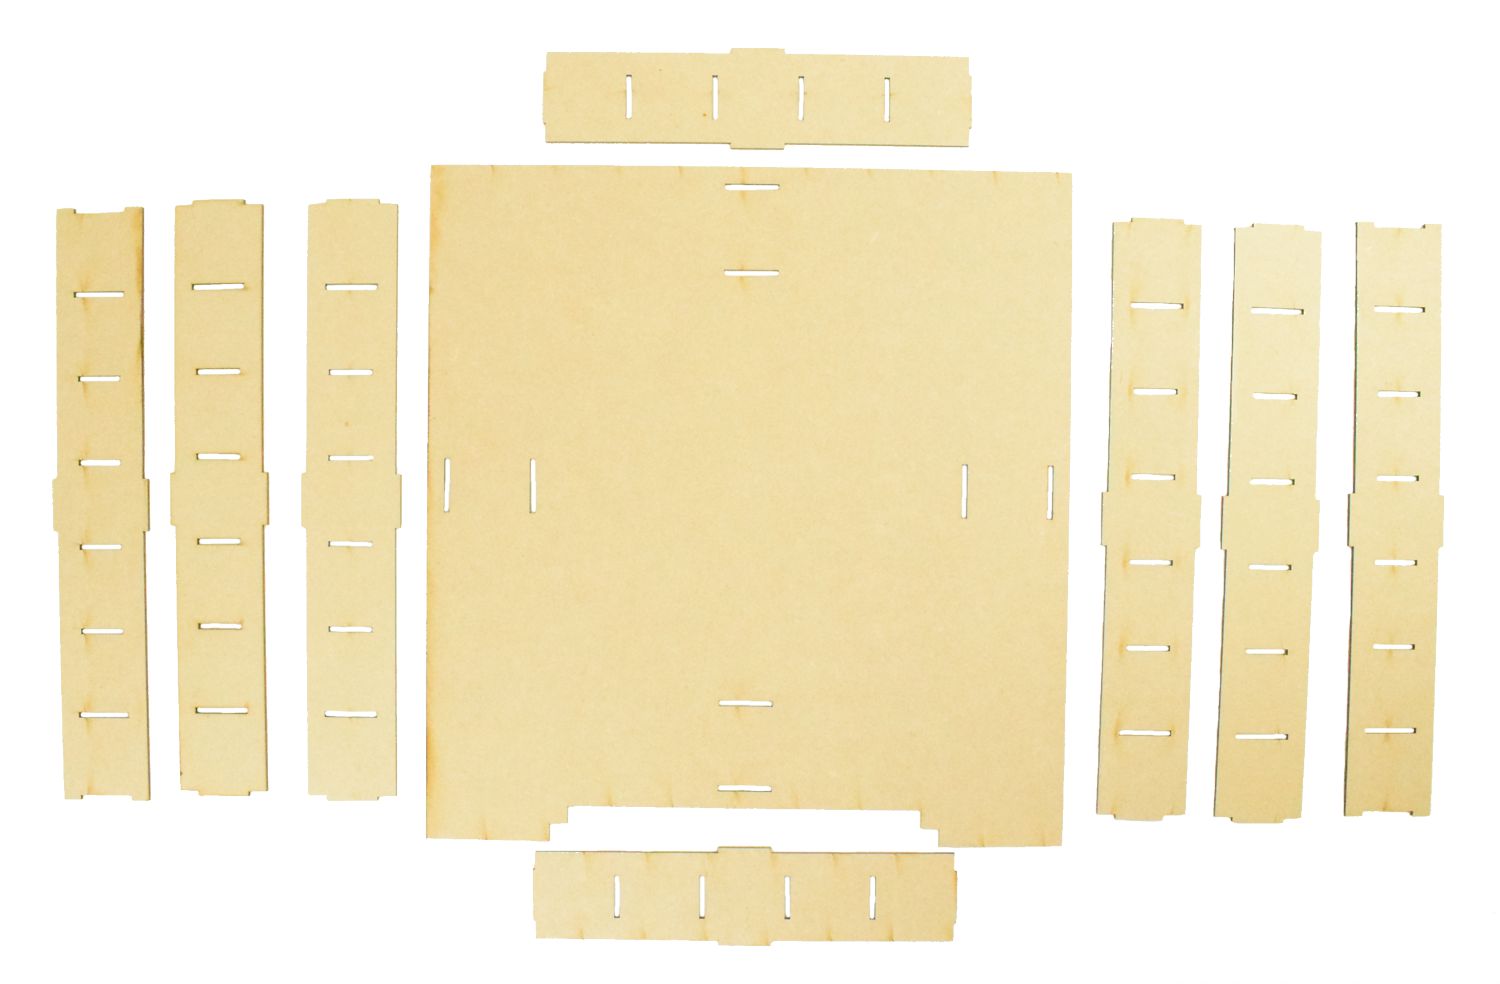
STEP ONE
Take the back section,
2 of the long pieces with pieces sticking out the ends
and the 2 shorter pieces
STEP TWO
Slot the long pieces in each side (the slots cloest to the centre)
Slot the smaller pieces in the top and the bottom (the slots closest to the centre)
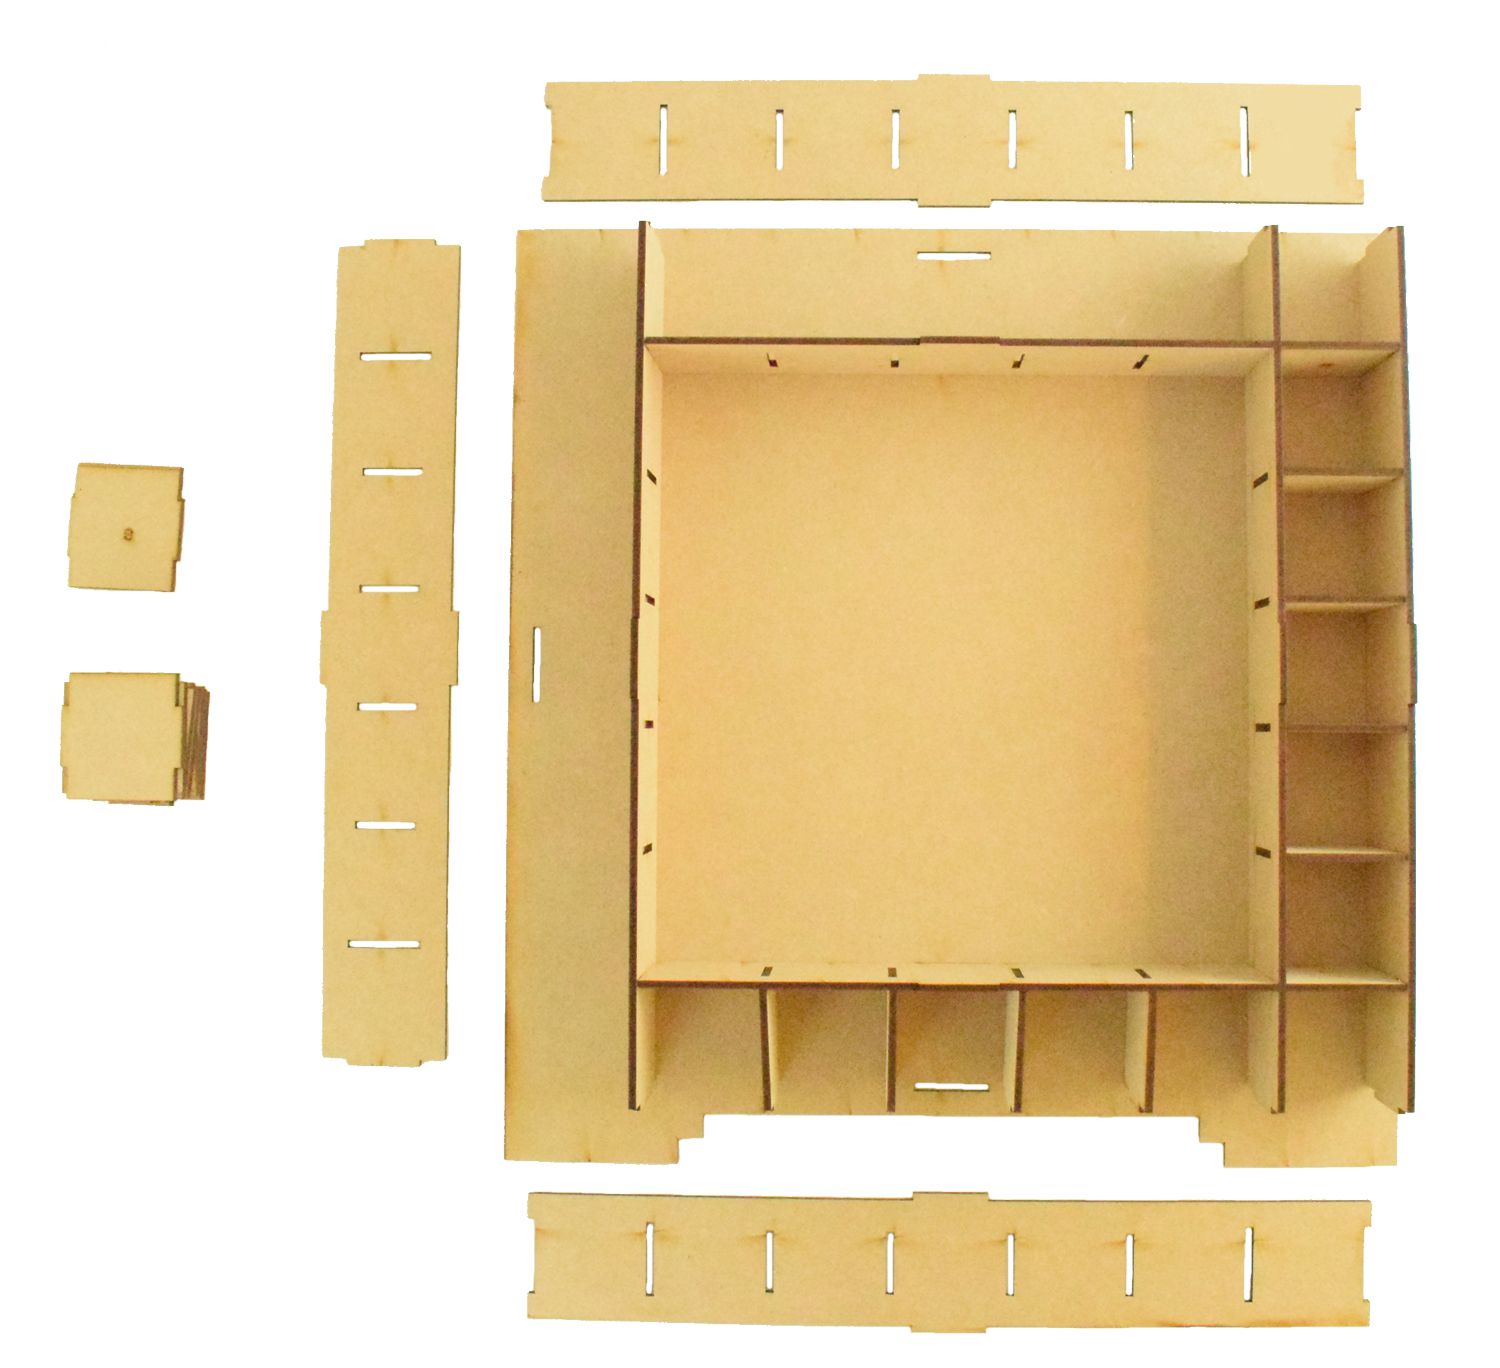
STEP THREE
There are 4 small squares with an s on and these also have smaller section that stick out each side
They slot in each corner inline with the small piece you slotted in the back section top and bottom
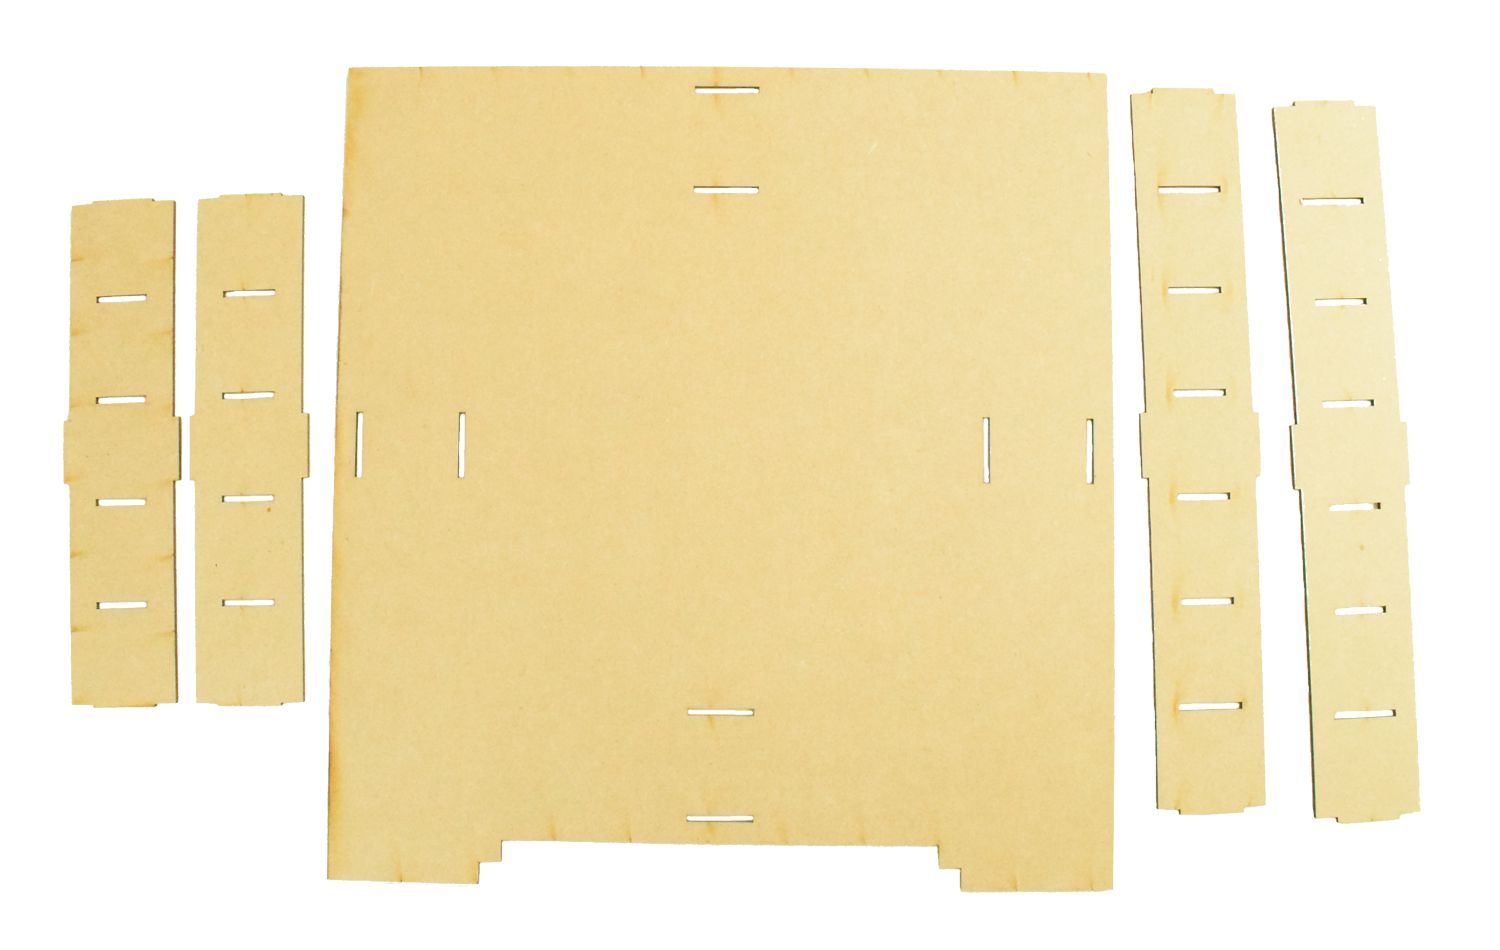
You will also need the 4 other long pieces and the rest of the square pieces next
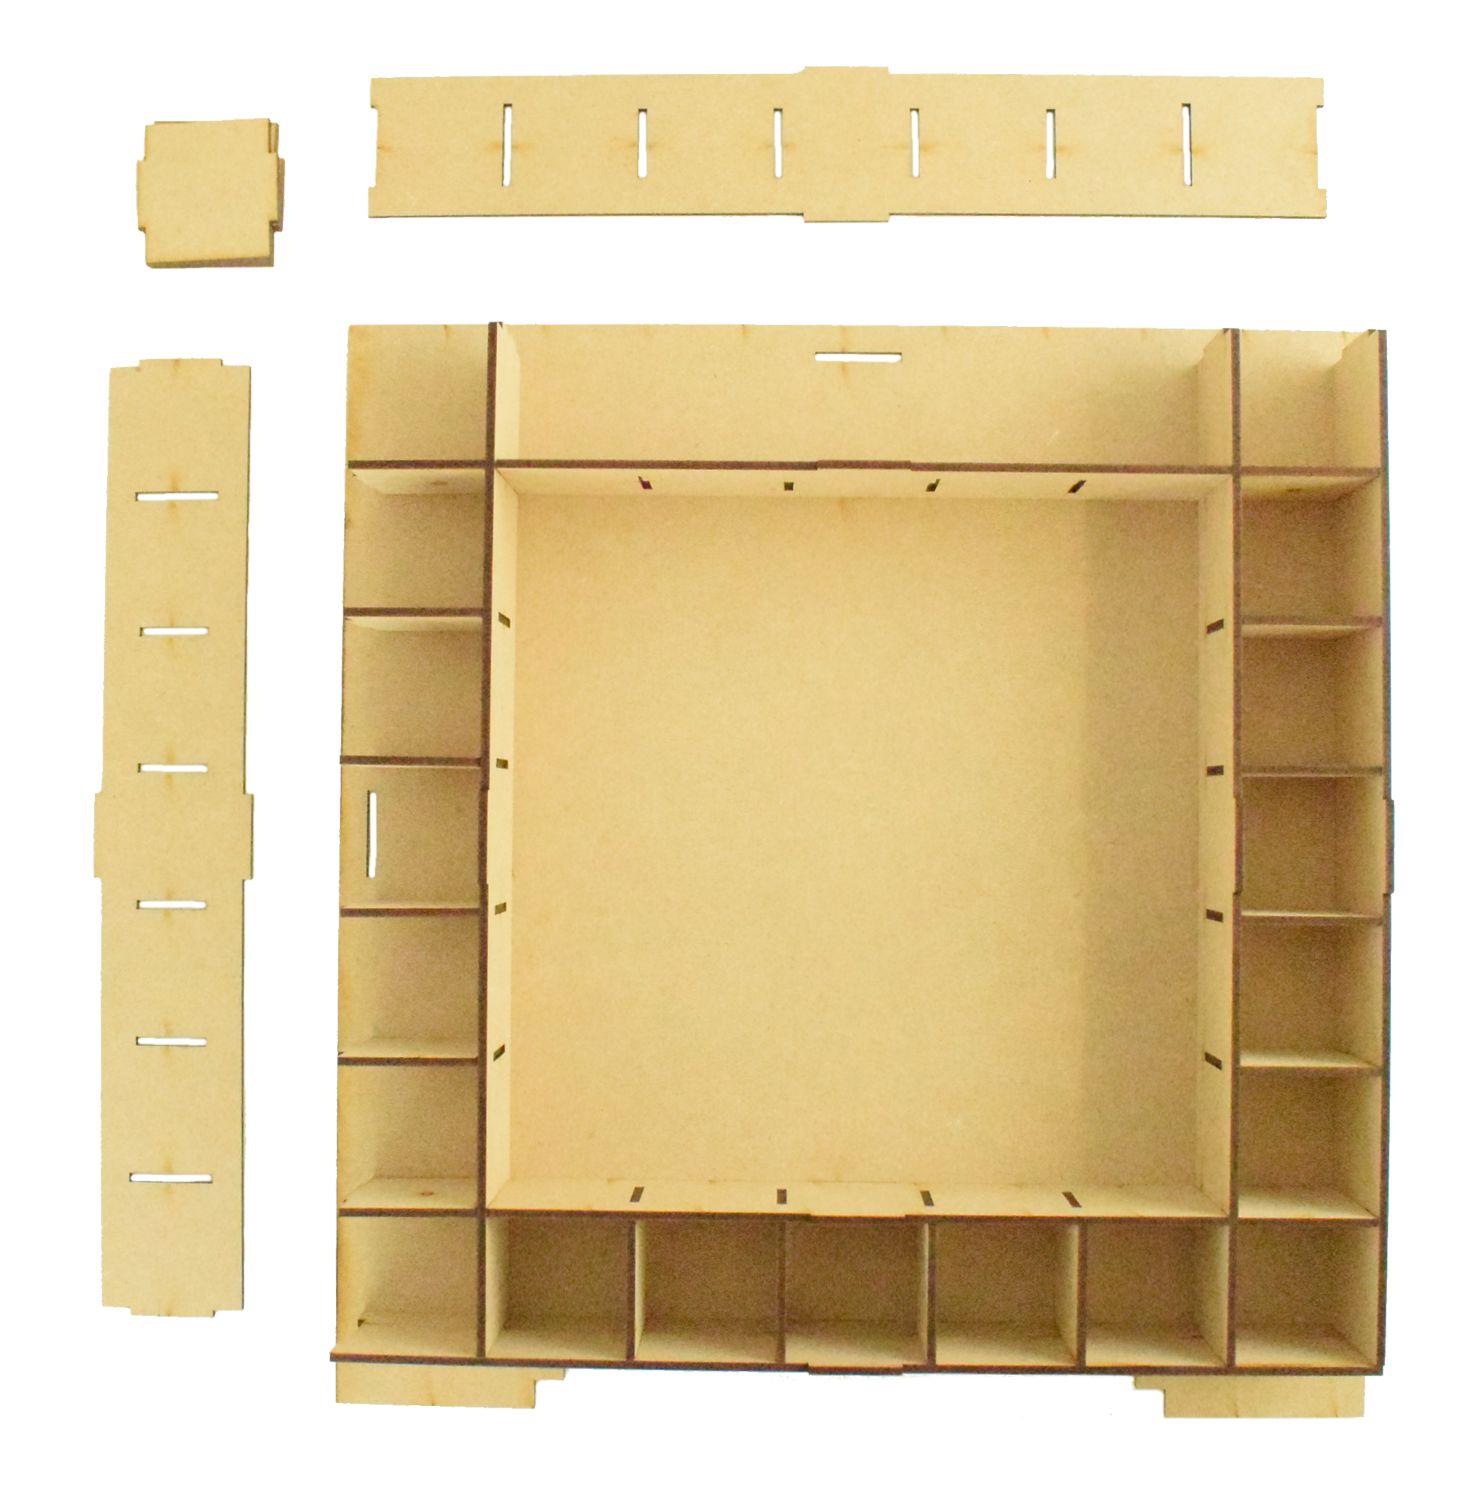
STEP FOUR
Start by applying wood glue into the cut out sections on each end of the long pieces
Next slot in both small pieces with the s on in the top and bottom corner
Then go along the side and bottom slotting in the small square pieces
Once done you can slot the long sections (with the pieces sticking out the ends) into the side and bottom.
**TOP TOP** lift the little pieces up slightly as you move along slotting it together, it can help to start in the centre moving outwards lifting and pushing.
STEP FIVE
Repeat on the other side
STEP SIX
Repeat along the top
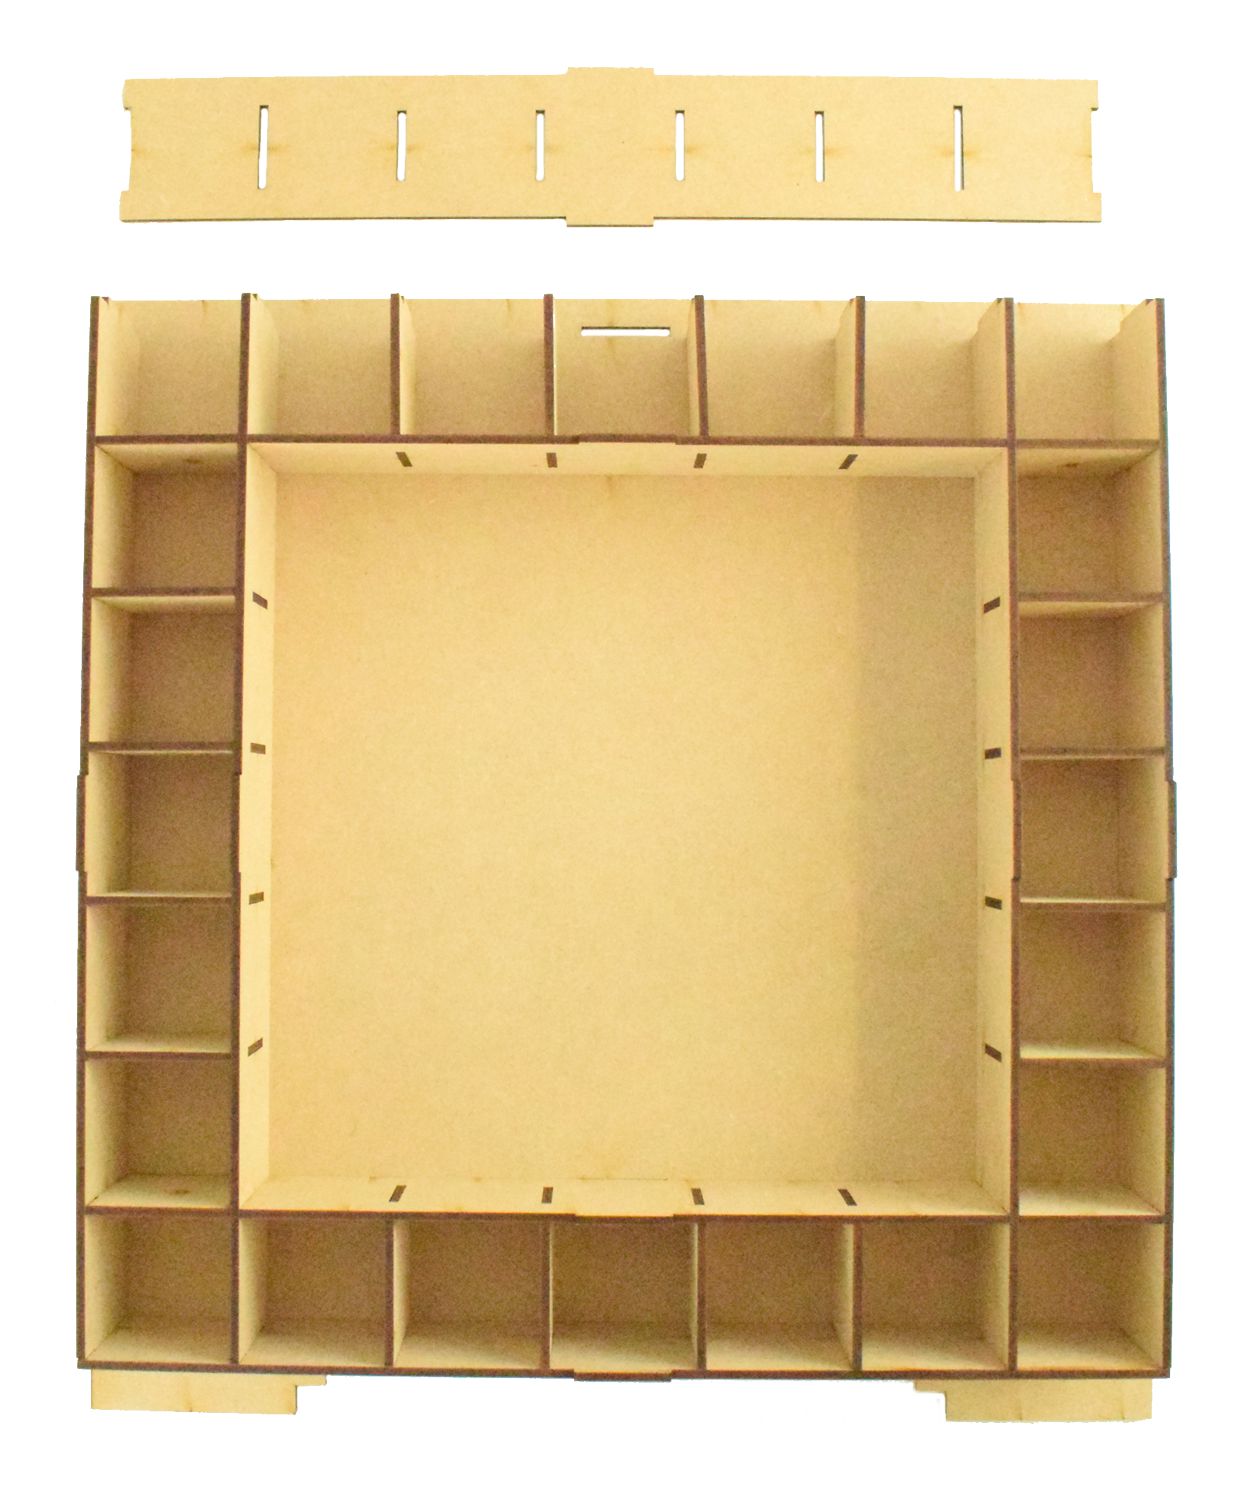
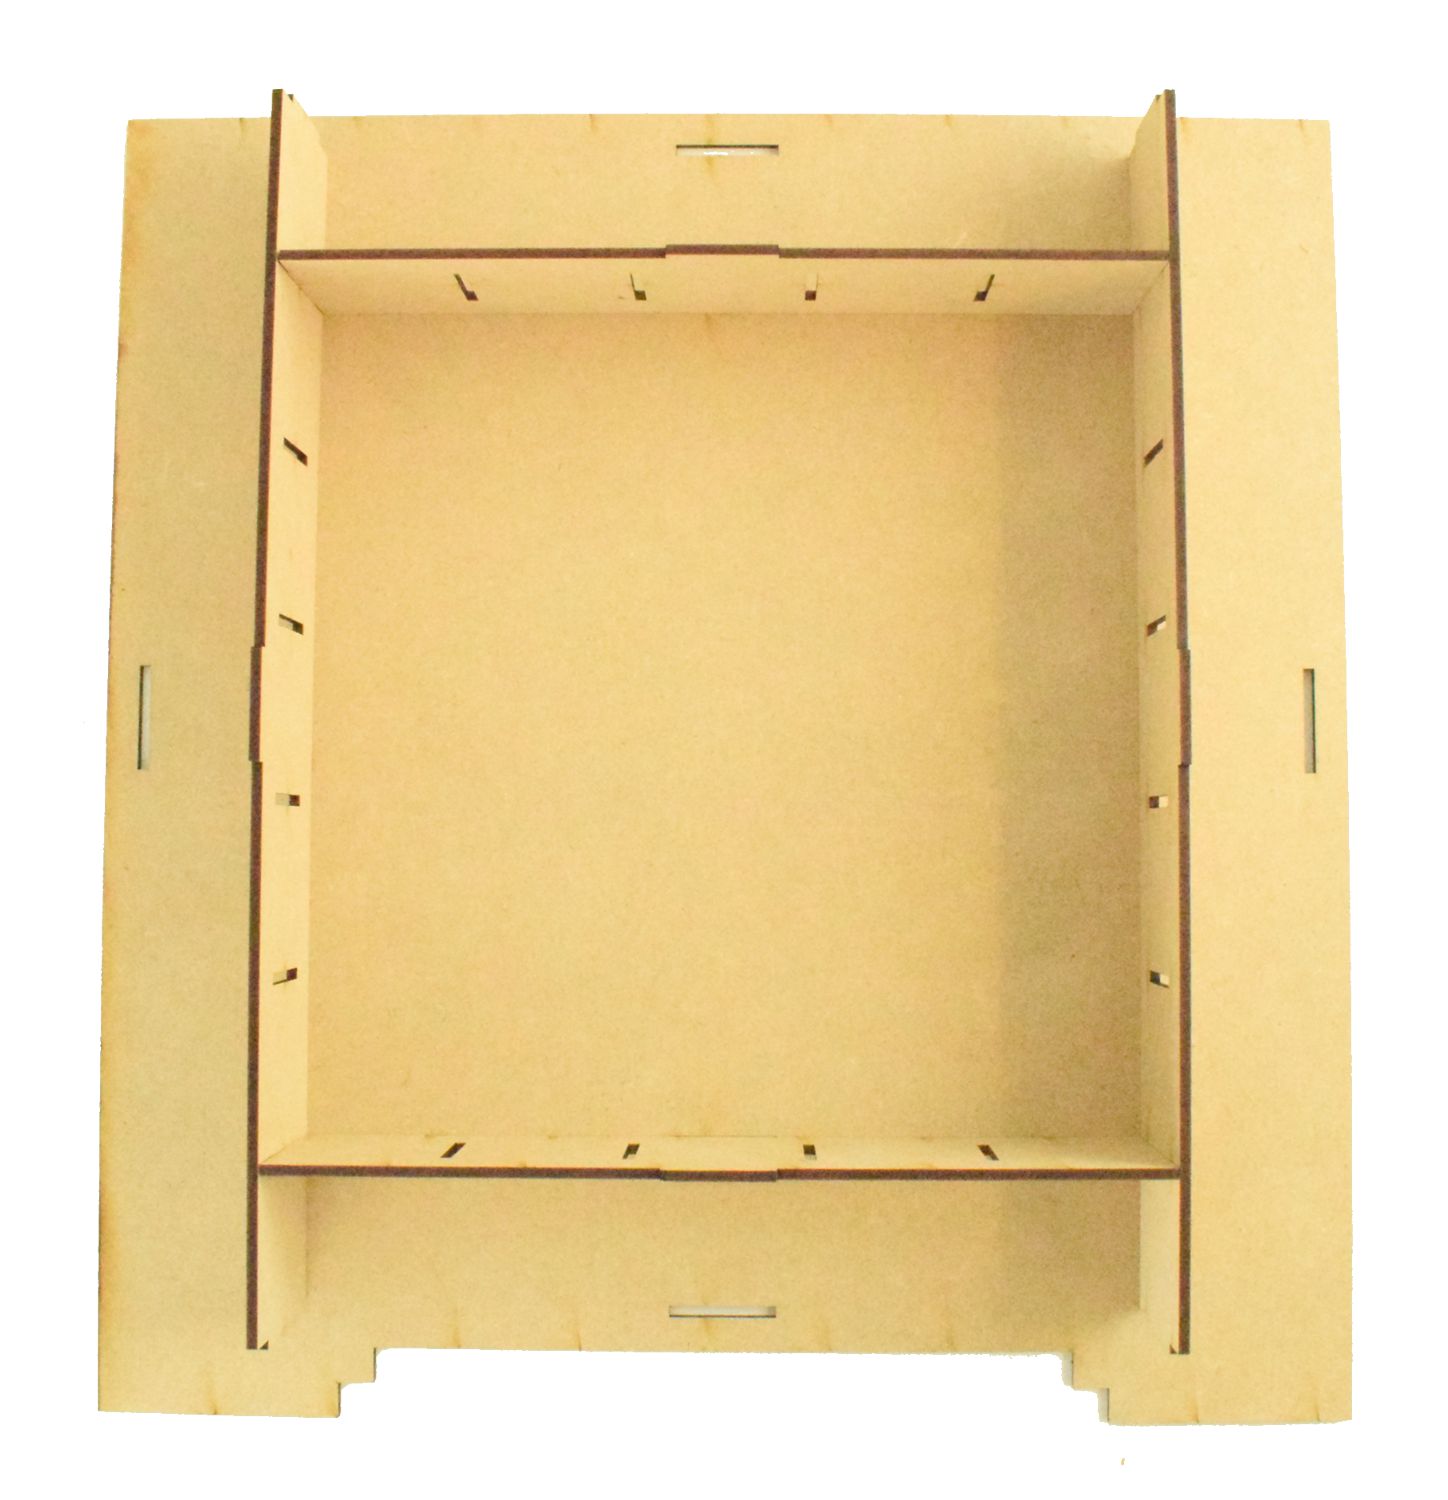
STEP SEVEN
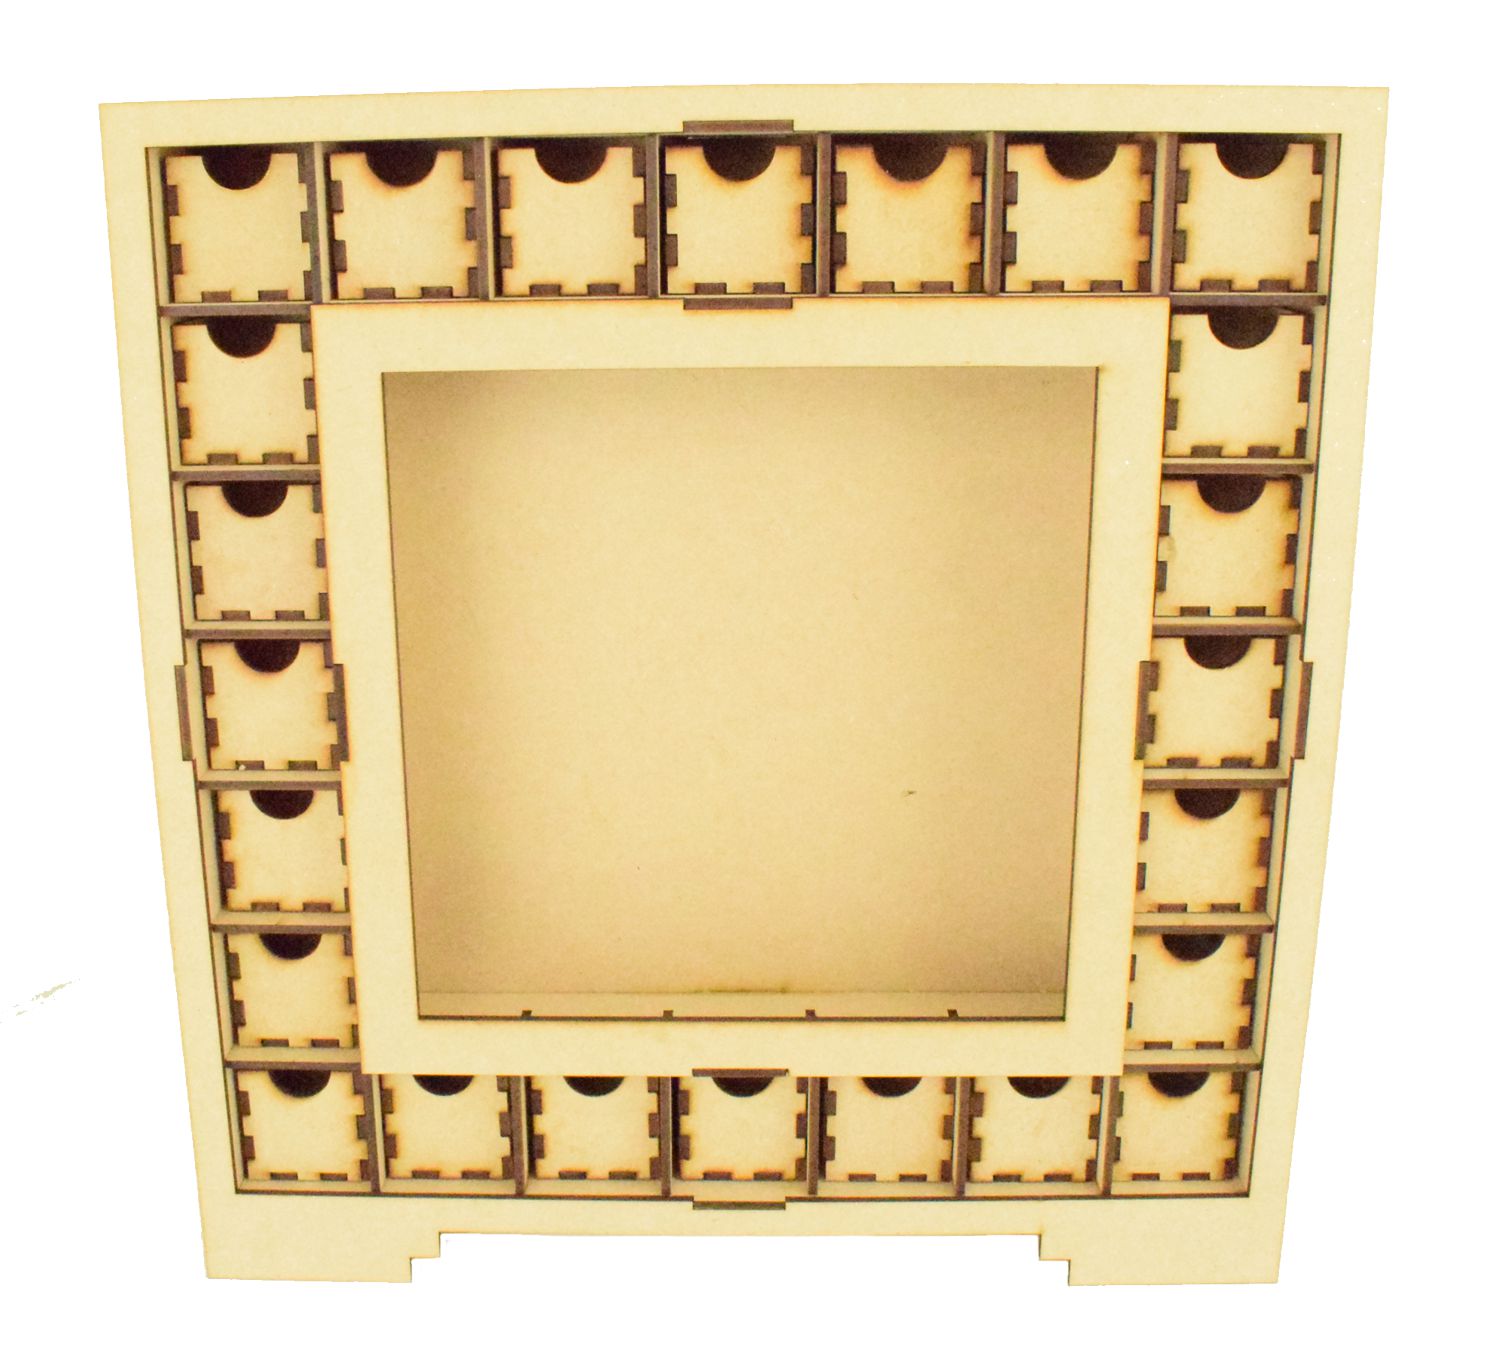
Drawer sections complete
STEP EIGHT
Apply wood glue to either side of the raised pieces around the outer and inner square edges where the frames pieces slot on the front
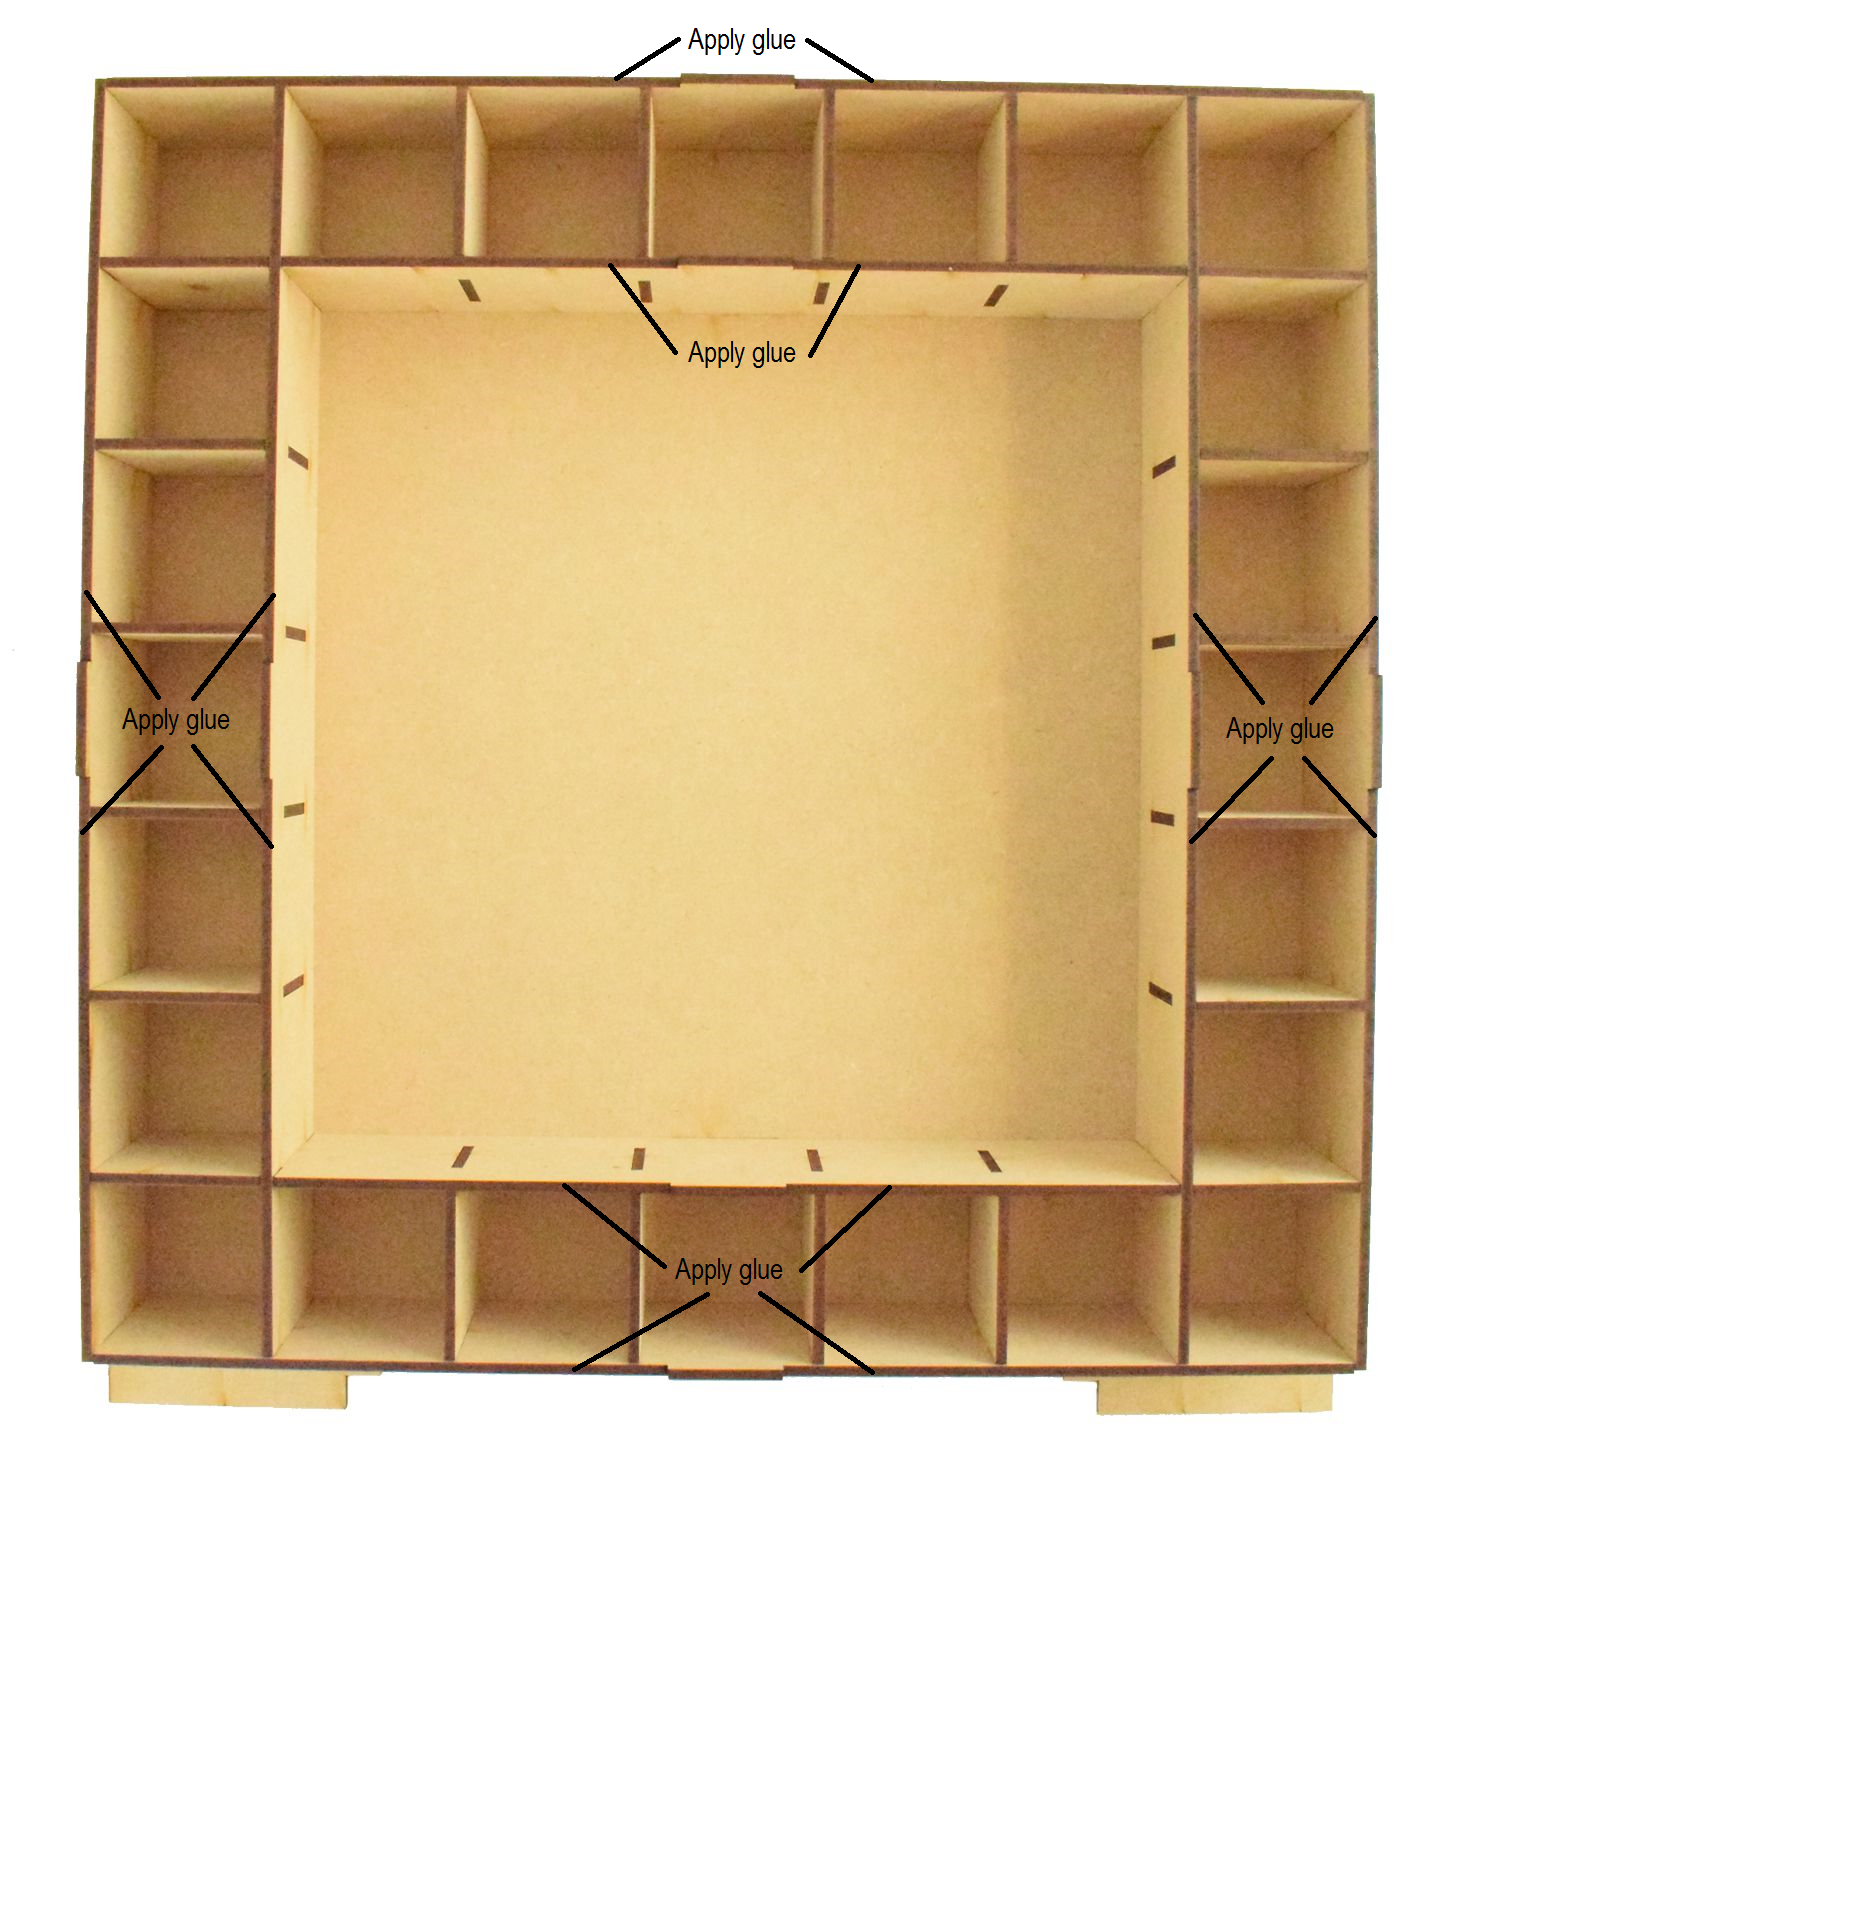
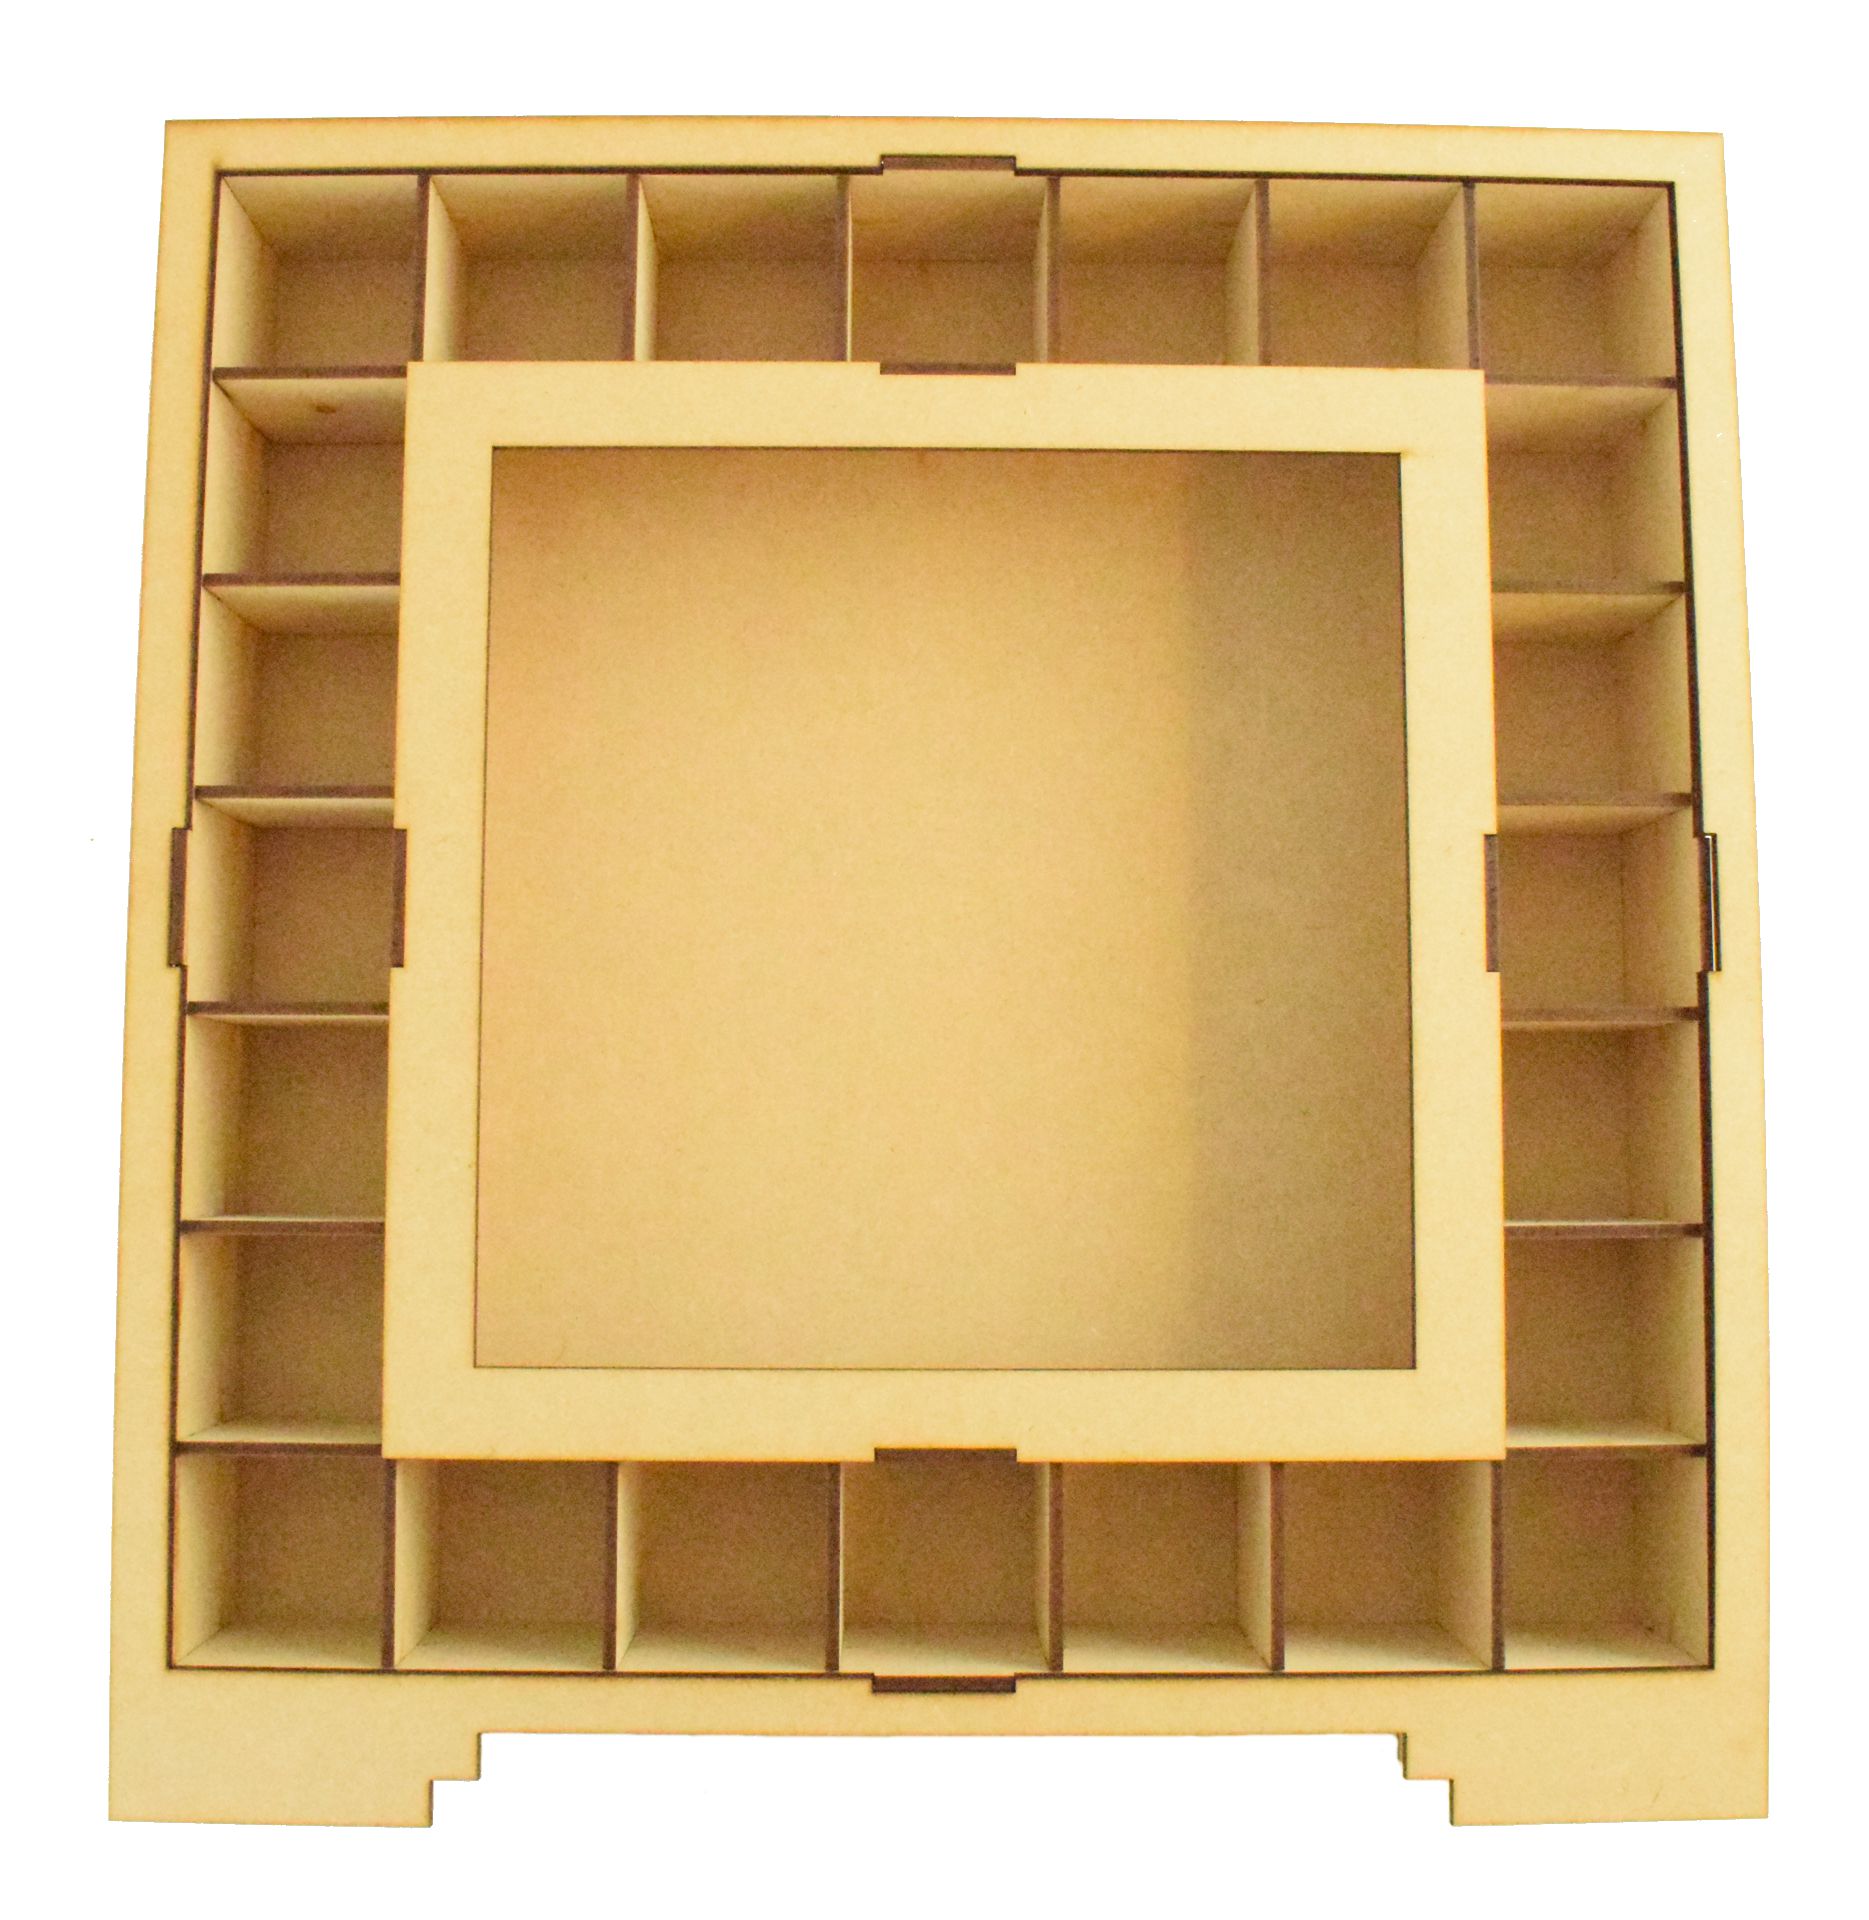
Slot the outer and inner frame sections onto the calendar
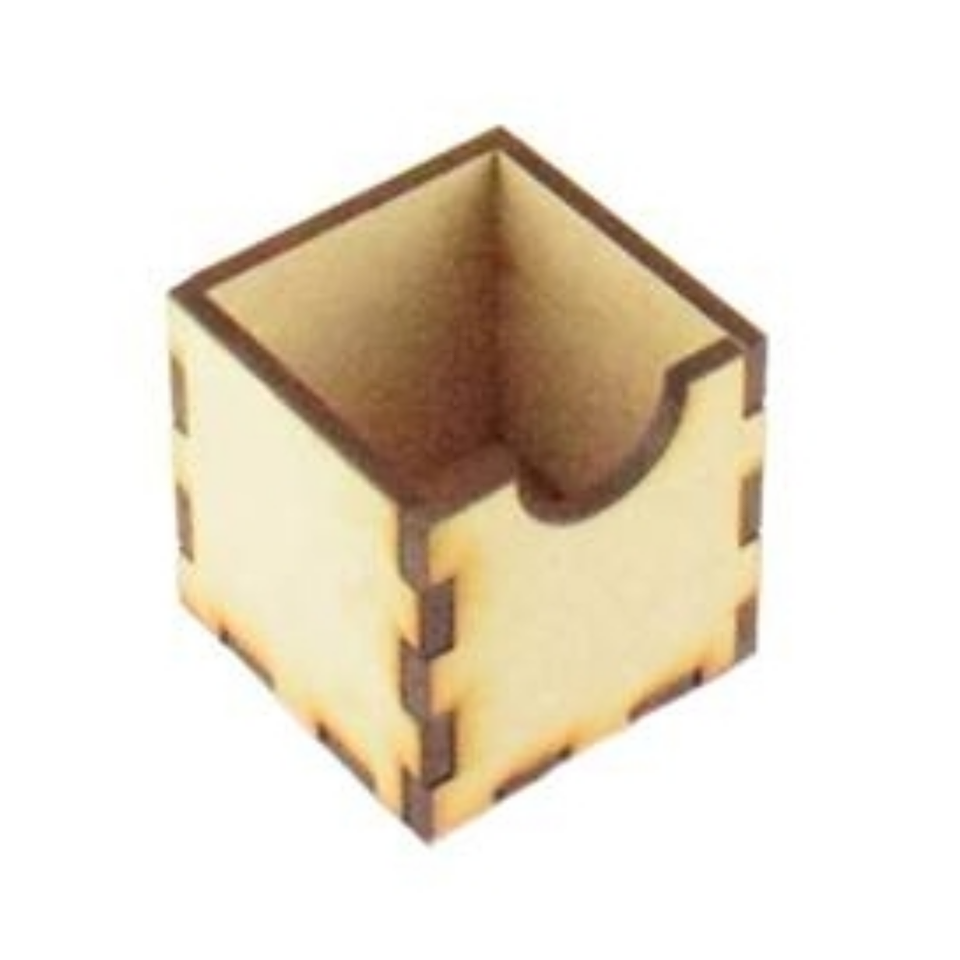
Drawers
You will need these pieces for each drawer
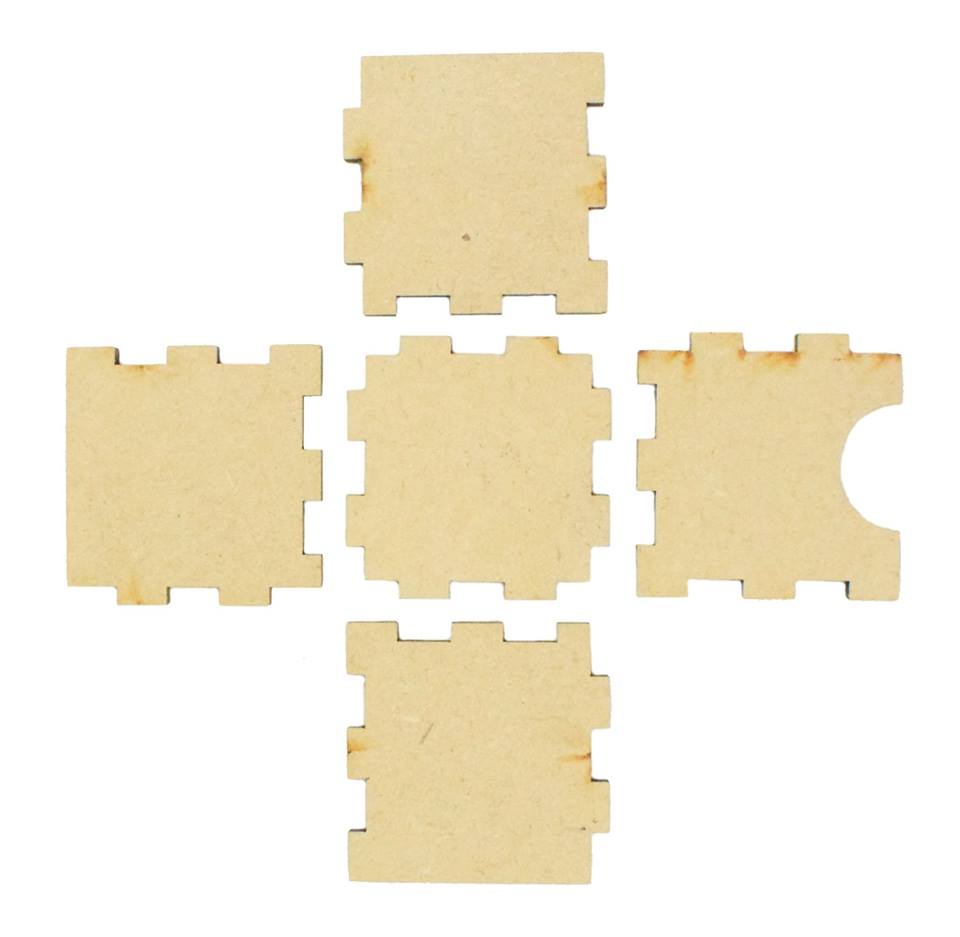
Apply wood glue to all the lower teethed areas
Once done slot together and pull the sides up to join
COMPLETE
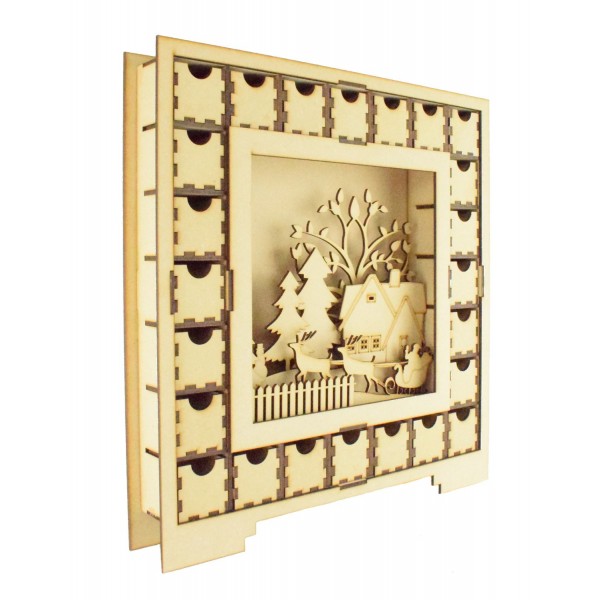
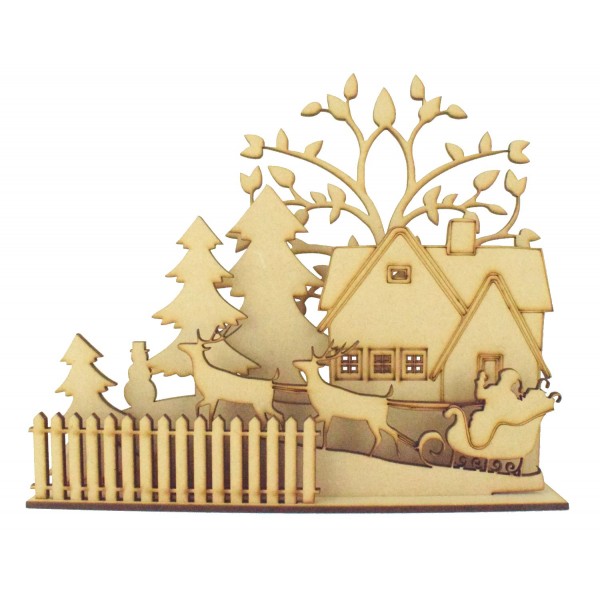
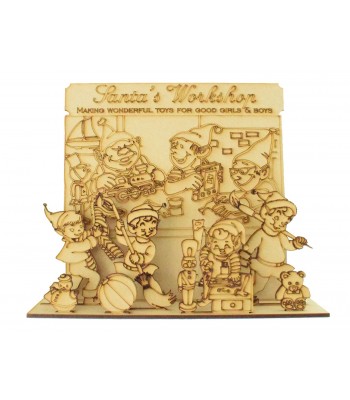
Scenes available for the centre
.jpg)
.jpg)
You can also get calendar numbers for the drawers

PLUS a variety of light colour options

We hope you found this blog post helpful, please leave us a comment below :)