Ramadan Calendar Instructions
Here is an instruction video to show how to put together our calendars
We also have a photo guide and instructions for further step by step information
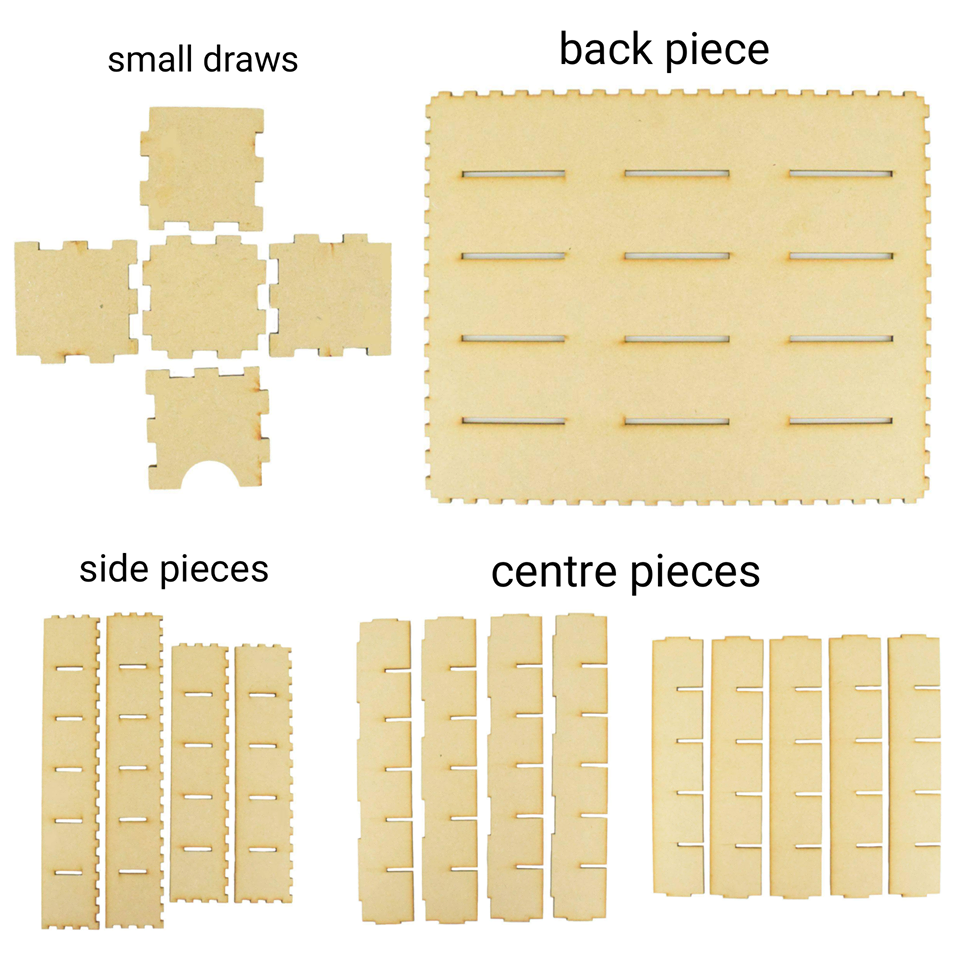
WHAT YOU NEED

wood glue is available to order HERE
STEP ONE
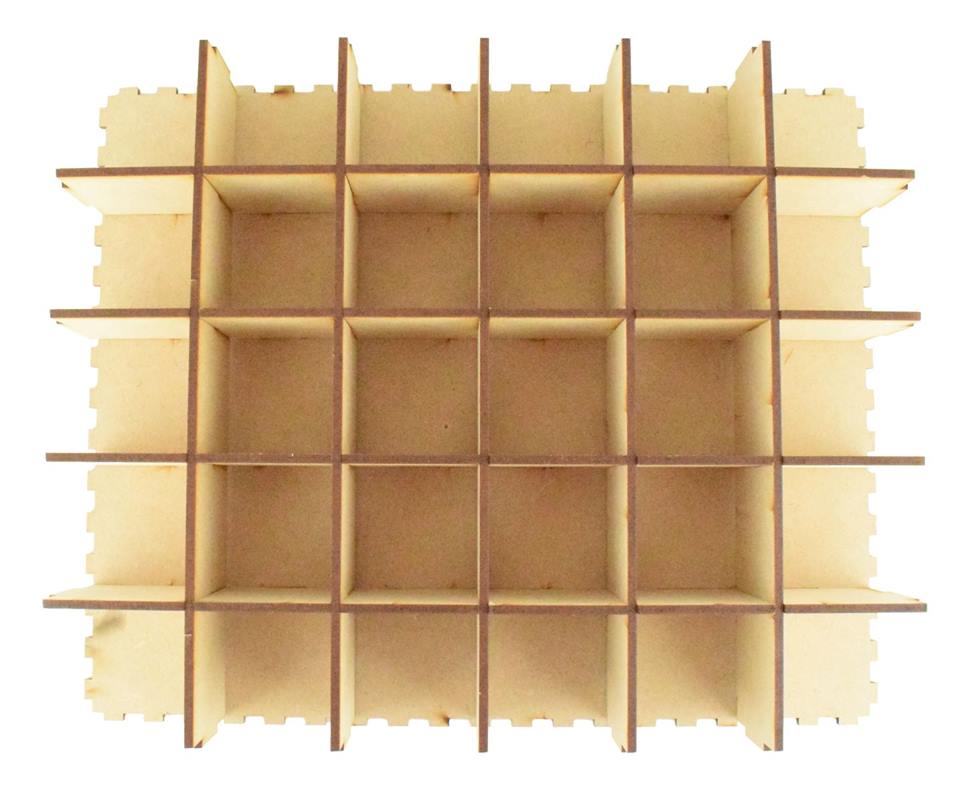
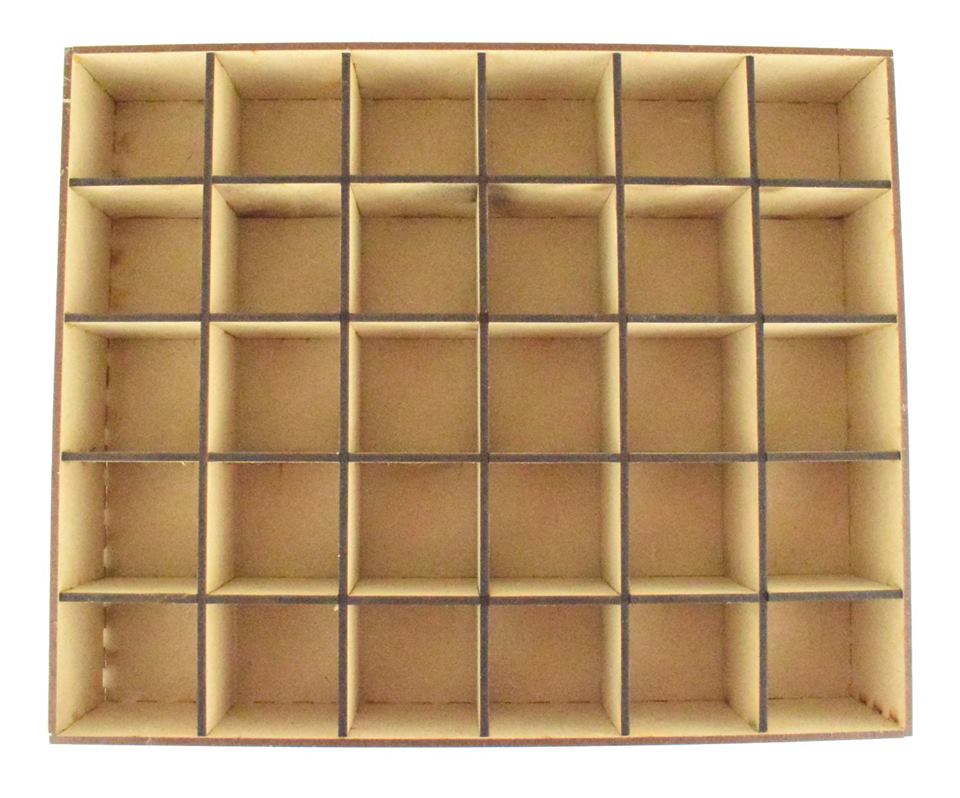
Take the long pieces with the slots along the top and slot them in length ways into the back piece of the box
Then take the smaller pieces with slots along the bottom and slot these in across ways. Creating a criss cross pattern - see photo below
STEP TWO
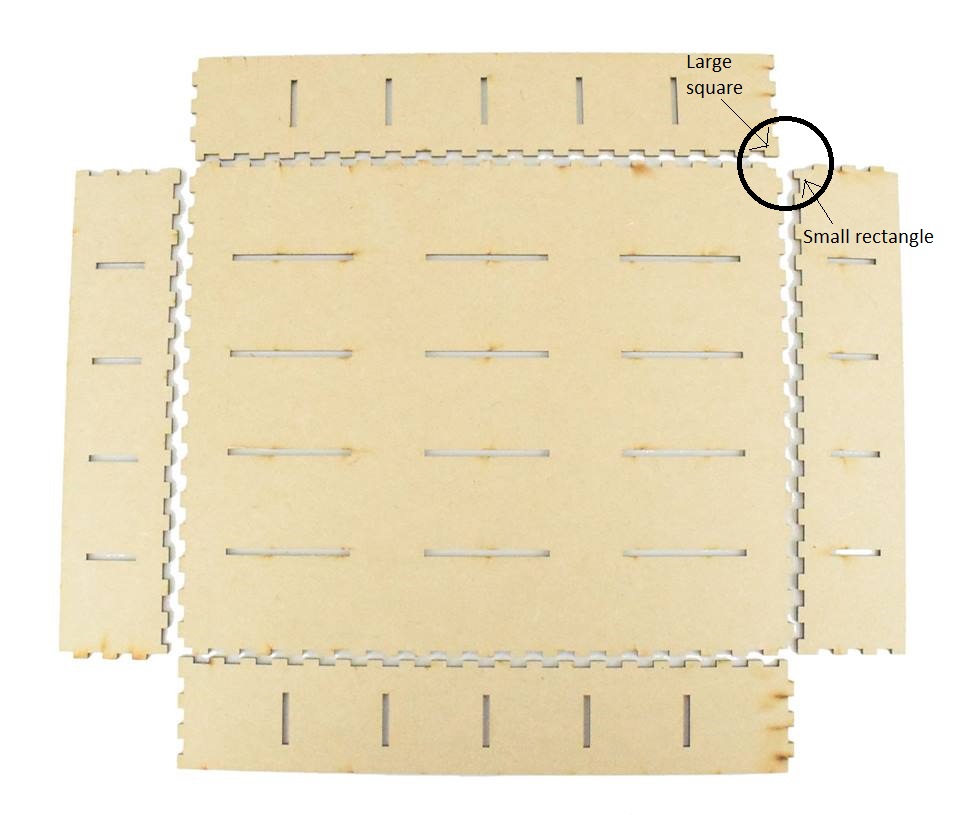
Take the 4 side pieces and layout as the photo below - Here is how they fit
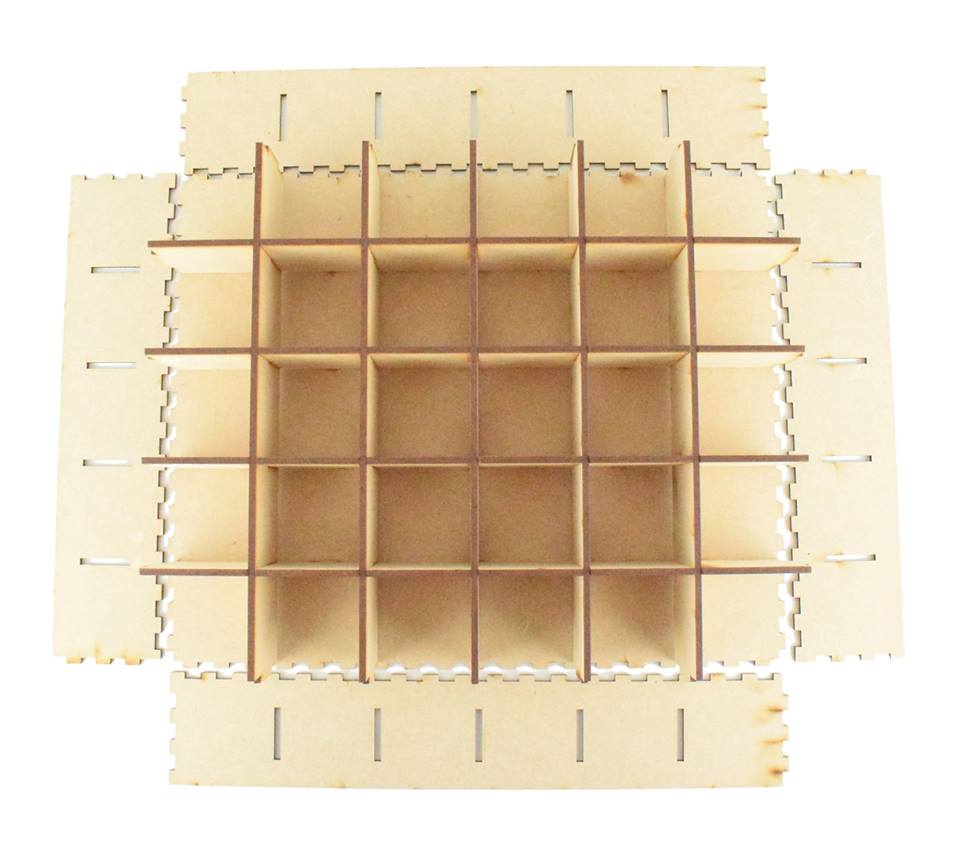
CORNER JOINS
In each corner join you will have a large square and a small rectangle which fit together. This is the same for every corner as shown below
GLUING
You will need to apply wood glue to all the lower teethed areas on all the 4 side pieces and all 4 sides on the back piece.
You can now add and join each side piece one at a time
TOP TIP - stand it up and fit each piece on the top and keep turning it round so your always adding the piece to the top until complete
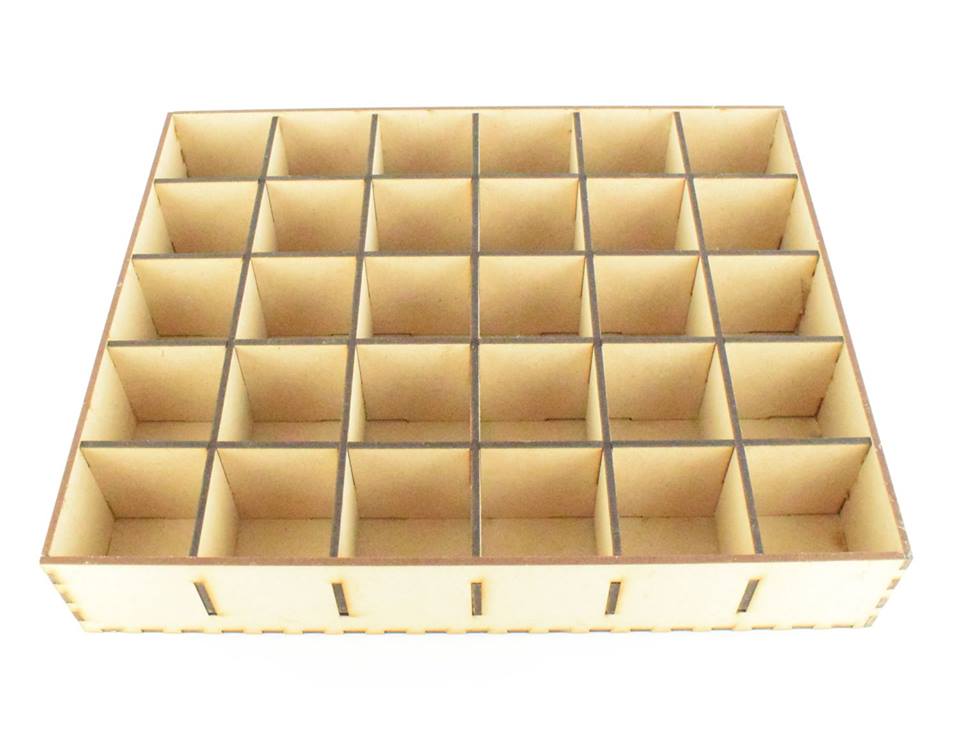
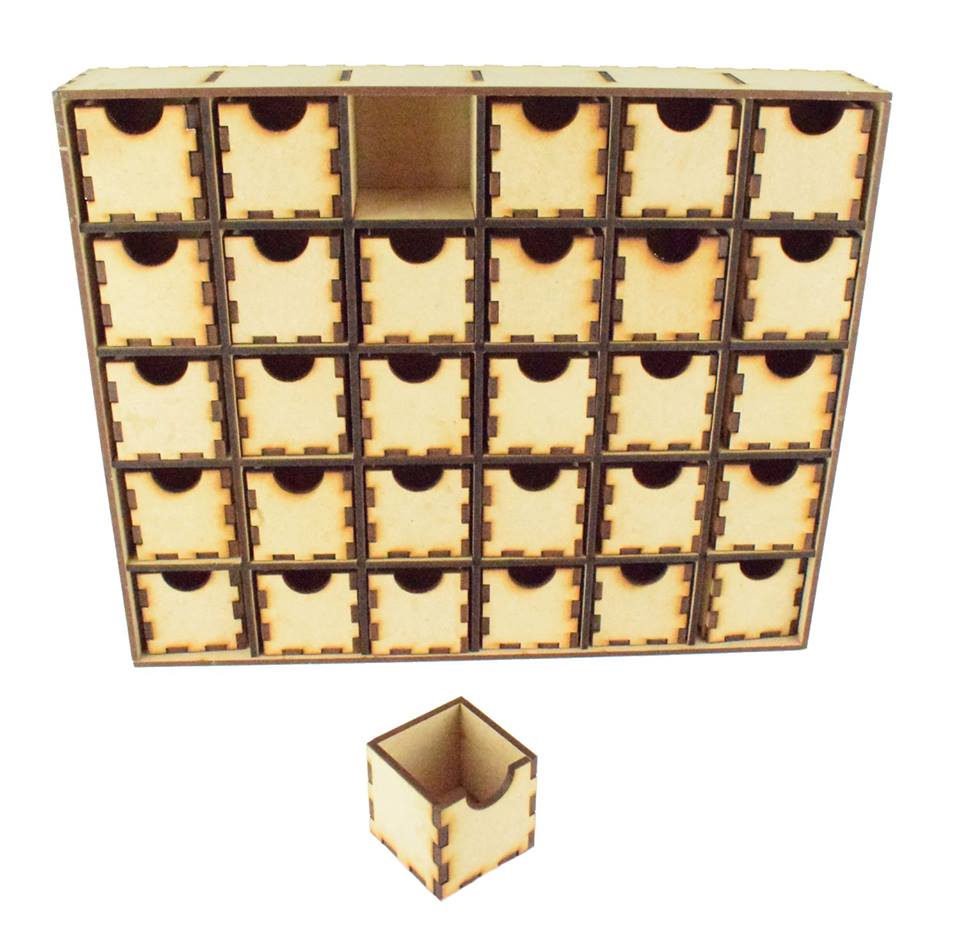
BOX SECTION COMPLETE
STEP THREE
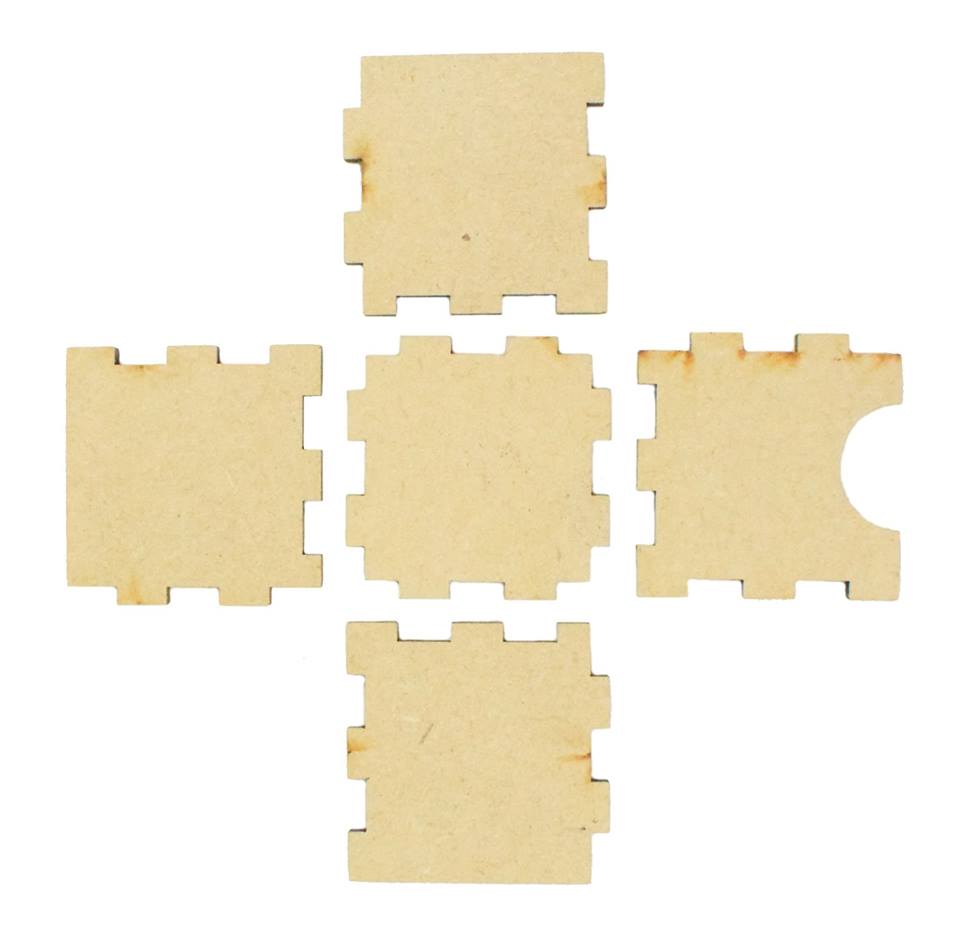
You will need these 5 pieces to make up each of the little draw boxes
GLUING
You need to apply wood glue to all the lower teethed areas on all of the 5 pieces.
You can then bring each side up and slot together.
Remember the same corner join applies- large square against a small rectangle
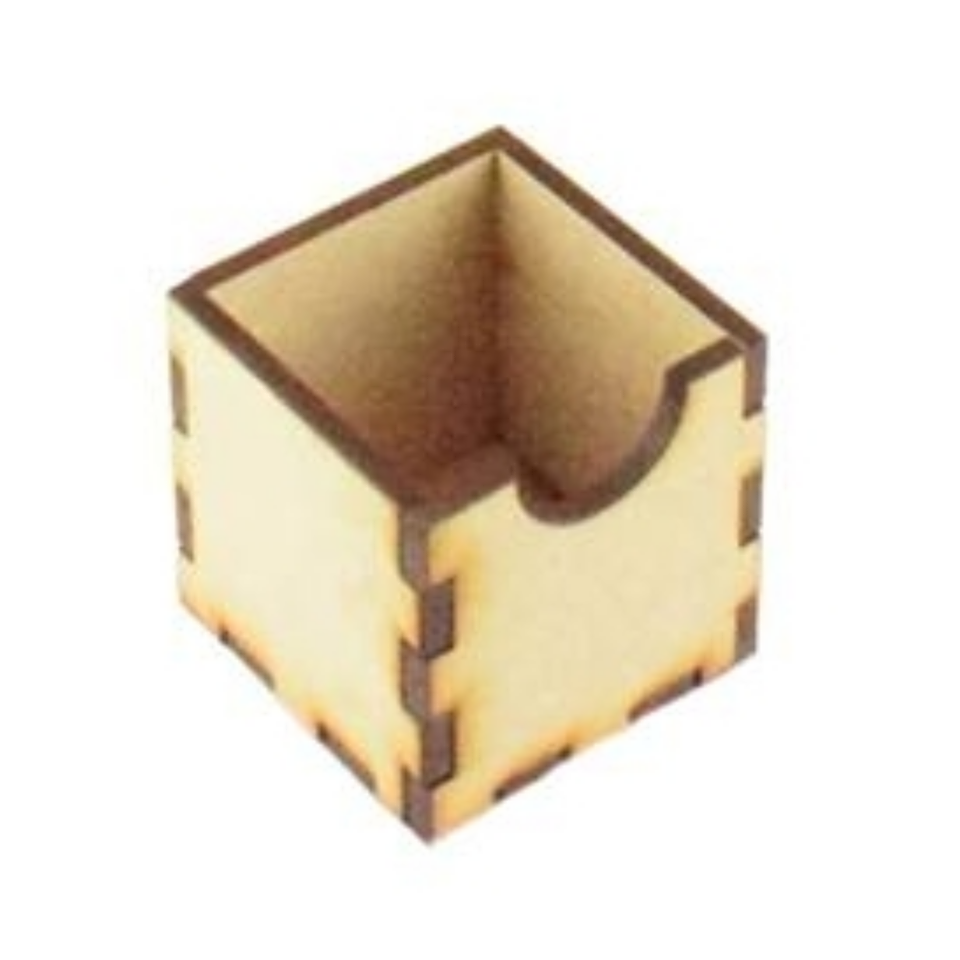
MAIN BOX WITH THE DRAWS
STEP FOUR
You can now make the Ramadan sign up to sit on the top -
simply slot the sections into the stand

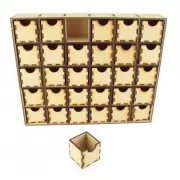
COMPLETED ITEM

Showing the calendar and sign separate
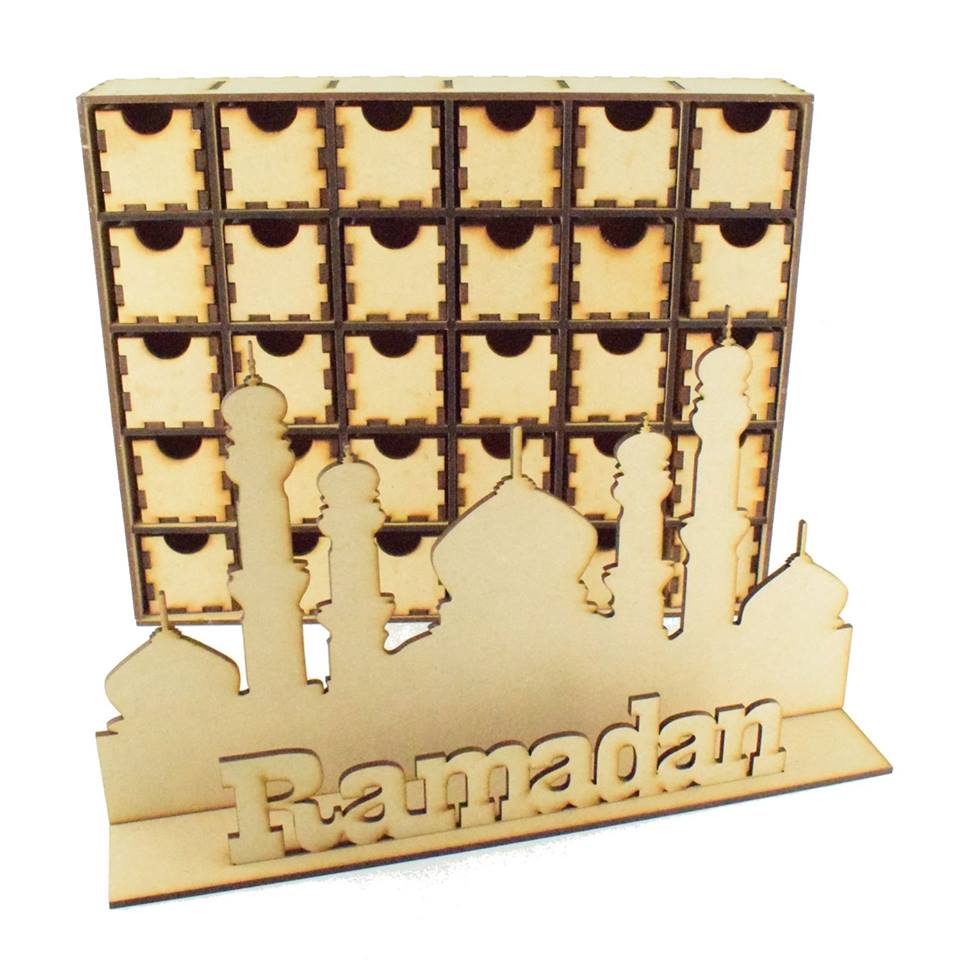
You can purchase the complete Ramadan sign with draws or we also do each item separate.
Links to this are below